Skip to content

re-ws.pl

ReverseEngineering WorkStation

  • Home
  • Tutorials
  • Random
  • About

Tag: hardware

Unboxing, startup and first impression of Nezha board marketed as first affordable RISCV SBC

Posted on July 6, 2021 by Kamil (aka. v3l0c1r4pt0r)
riscv logo

Some of you may have already heard about new RISCV board that popped up in China recently. It is called Nezha and is the first available SBC having new Allwinner D1 SoC with RISCV core and capable of running Linux. Authors are marketing it as first affordable RISCV Linux SBC and there is a lot of truth in these claims. Maybe this board cannot compete in any way with boards based on ARM Cortex A cores. On the other hand all previous RISCV offerings were in different galaxy in terms of price tag. $999 for Hifive Unleashed during its Crowdsupply campaign vs. $99 for Nezha on Indiegogo. They even claimed to go down as low as to $12, but as they say global supply chain problems made it impossible for now. We have to wait for all this pandemic troubles to end to check, if these claims could be verified by facts. Continue reading “Unboxing, startup and first impression of Nezha board marketed as first affordable RISCV SBC” →

Posted in UncategorizedTagged English, hardware, Linux, RISCV1 Comment

uCM4 – really small CM4 carrier board for network projects

Posted on May 22, 2021 - May 22, 2021 by Kamil (aka. v3l0c1r4pt0r)
uCM4 PCB promo

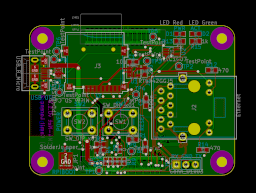
Few days back I published a hint that I am working on some hardware project, that utilized some networking, by publishing KiCAD footprints of connectors that I use. Now the time has come to reveal all the details. This was possible due to board being basically working.

And the project is Raspberry Pi Compute Module 4 carrier/base board. Just to give a brief here, it is a board that is meant to allow connecting CM4 SoM modules to network and take as little space as practically possible. I would call this device smallest possible CM4 carrier board, but then probably somebody will prove me wrong by designing something smaller. But to still be practical, it is almost the smallest it could, as it is exactly same footprint as CM4 itself. By making it even smaller, I would have to remove mounting holes, as they are exactly at the edges.

Getting to the interesting part, it is meant to connect to Ethernet and allow you to do whatever you like. The only thing you need to connect beside Ethernet is power via Micro USB connector. Worth to mention is that this is requirement of this particular iteration of the board, as it should be fairly easy to redesign it a bit to use PoE instead. Anyway, comparing to traditional Raspberry Pi, you get a lot of saved space at a cost of only 3 connector available (not counting UART header). And third, not mentioned yet, is microSD card slot, that is completely optional, but present in my case, as I use CM4Lite variant with no storage, so this is rather a useful feature. Getting rid of this requirement on CM4Lite SoMs might be a subject of future research from my side, as I heard about network boot on RPi, but have not tried it myself yet. Continue reading “uCM4 – really small CM4 carrier board for network projects” →

Posted in NewsTagged Compute Module, English, hardware, KiCAD, PCB, Raspberry Pi, uCM42 Comments

My small library of KiCAD footprints

Posted on May 16, 2021 - May 16, 2021 by Kamil (aka. v3l0c1r4pt0r)
kicad logo

This time just a quick info. I just published library of KiCAD footprints that I made recently for my new project. The project itself has not been published yet and I want to keep it that way until I get first working prototype (what I hope will happen really soon). Meanwhile I am publishing this small library of footprints that I made for it with perspective of extending it in future with other hardware projects.

Still this is quite new topic for me as I have no electronics education, nor professional experience, so there is still a risk that I may fail at what I do and abandon such kind of projects. But for now, I just finished validation of footprints published here with a board that I ordered from JLCPCB, so you are guaranteed that they are fine (except one marked explicitly as such). Continue reading “My small library of KiCAD footprints” →

Posted in News, UncategorizedTagged electronics, English, hacking, hardware, KiCAD, PCBLeave a comment

Reading and programming 93Cx6 EEPROM with Digispark

Posted on December 14, 2020 - December 14, 2020 by Kamil (aka. v3l0c1r4pt0r)
st 93c56wp 93c56

For some time already, I am working on a big reverse engineering topic. I hope, I will be able to present something on that in future. Of course this would be something almost unique, if finished. For now I want to present a tool that I made while working on this big thing (as a side note, it’s not the first one, cc-factory was also created for that purpose).

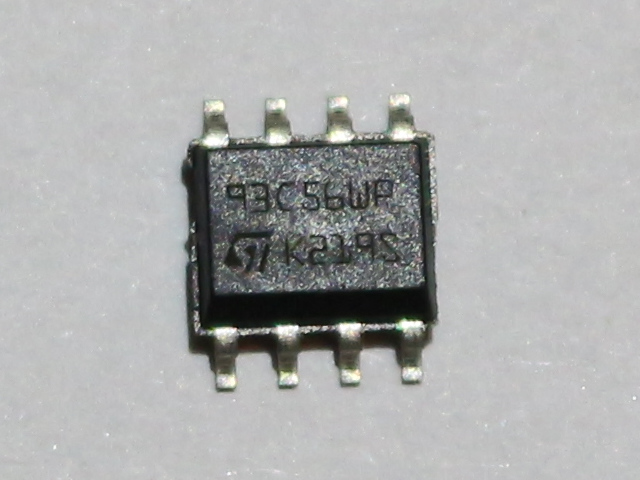
What I had to do, was to read contents of EEPROM, that I found on board, I am analyzing. It is quite obscure, as Google did not return anything useful (beside Taobao auctions). Fortunately I learned that chip it is connected to expect EEPROM from the 93Cx6 series. So, to not break anything, I bought few similar memory chips from usual source. In the meantime, I found that this thing talks Microwire protocol, which is quite similar, but not identical to SPI. This means that flashrom is not an option here. It is however similar enough to SPI that some people were successful in talking to these EEPROMs on SPI bus. Unfortunately, I did not have any device that was confirmed successful and I did not want to experiment with low chance of success. Luckily for me, there is simple Arduino library, that bit-bangs the protocol. I am not a big fan of Arduino, but I have few Digispark boards, so I decided to give it a try. Obviously, the fact that this post appeared means, I was successful. Nevertheless, it was not that easy. At least for me, so I share my experience, just in case someone have similar problem. Enough of this, let’s read (and write, if you want) Microwire 93C56 EEPROM with Arduino sketch and Digispark board, via USB virtual serial port. Because, why not? 🙂 Continue reading “Reading and programming 93Cx6 EEPROM with Digispark” →

Posted in TutorialsTagged Arduino, digispark, EEPROM, English, hacking, hardwareLeave a comment

Playing with GF-07 GPS device

Posted on December 11, 2019 by Kamil (aka. v3l0c1r4pt0r)
GPS GF-07

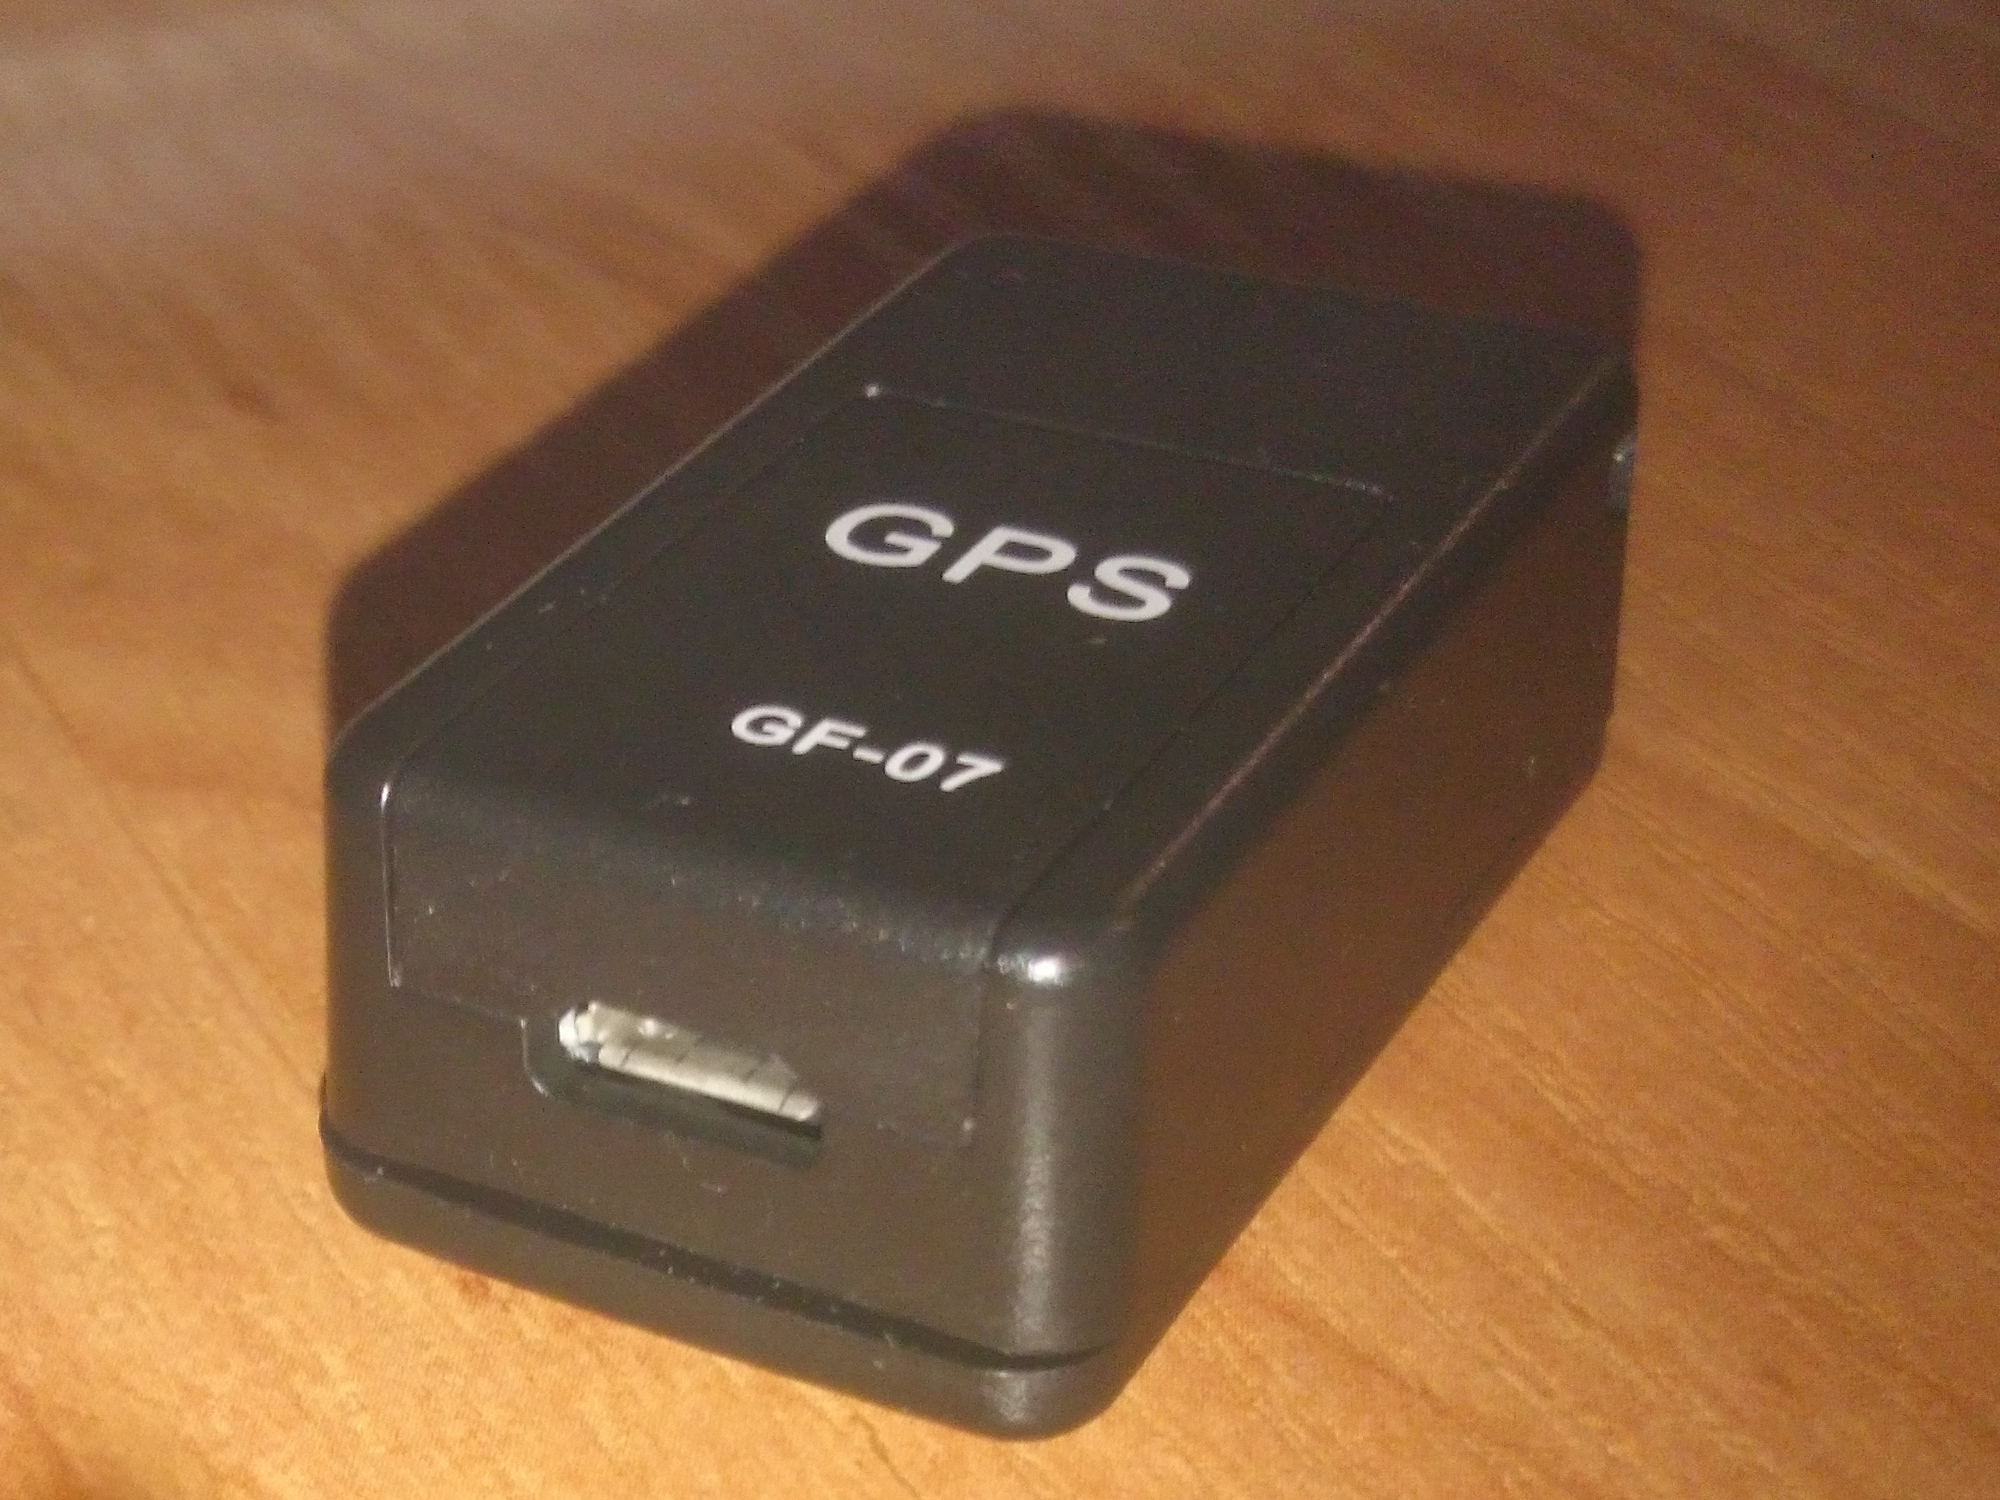
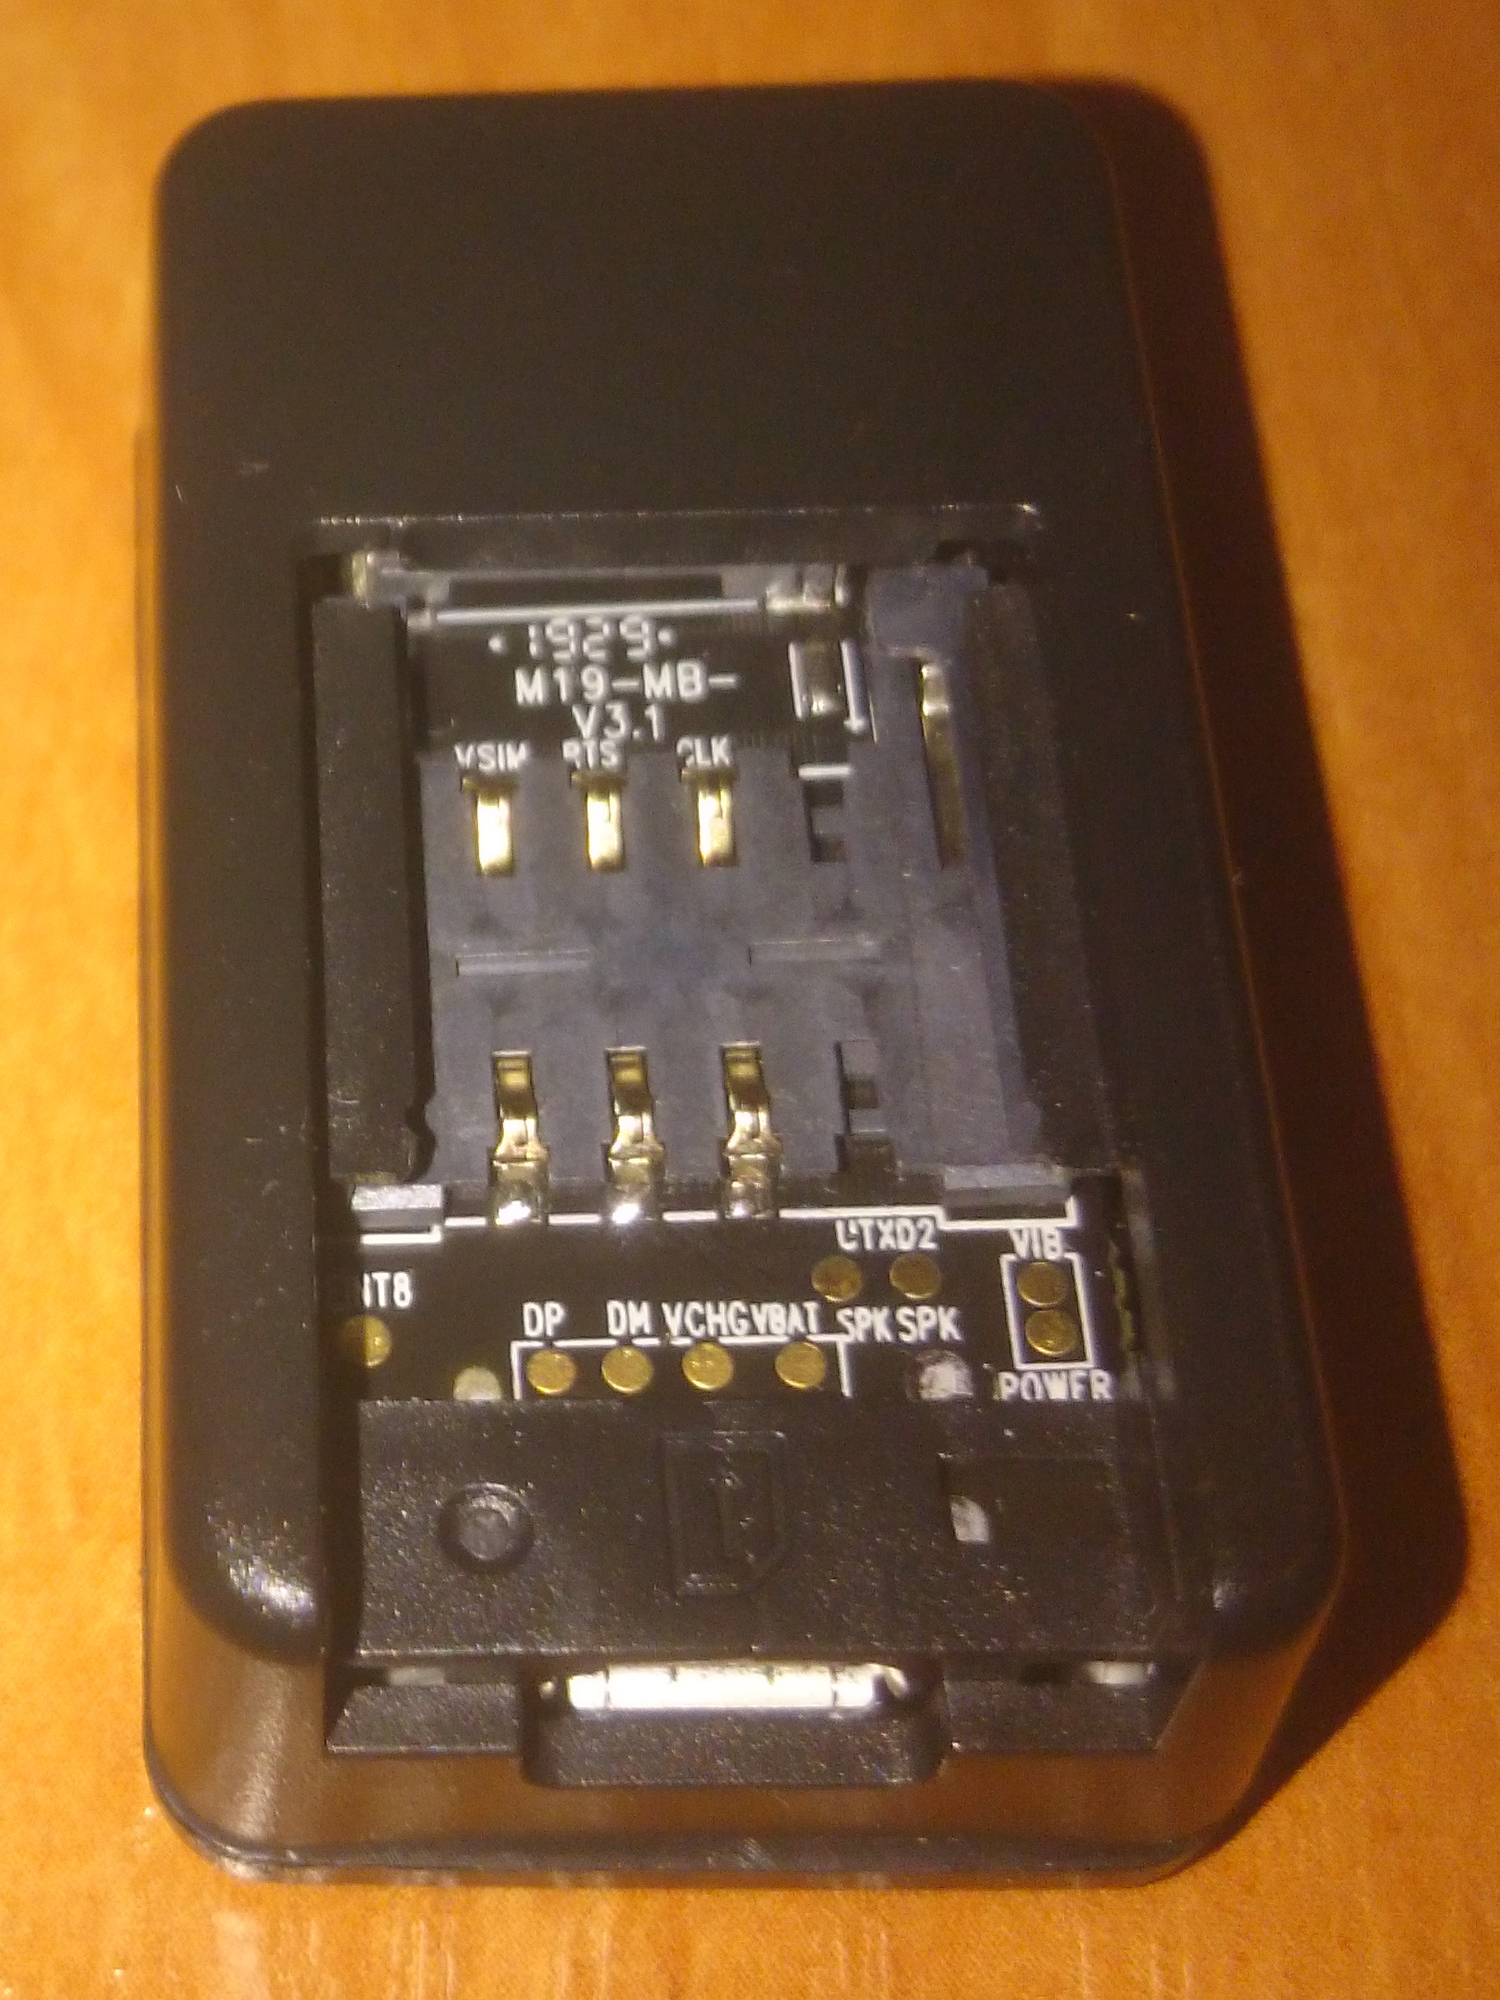
GF-07 is dirt-cheap GPS locator. You put SIM card in it, send SMS and you know where it is. That’s it. But not for me. I like to know what I am using, especially if it is that cheap and such obscure device as this one. It comes together with manual that is written in so bad English that I barely understand anything. Immediately after opening SIM slot, one can see few test pads. Fortunately all of them are described in silkscreen. Let’s see what can be done with it as a one-evening hack.

GF-07 opened
SIM cover opened (pin headers visible)

Continue reading “Playing with GF-07 GPS device” →

Posted in RandomTagged English, GPS, GSM, hacking, hardware, Reverse Engineering32 Comments

New VCI+A-BT (DS150E) ST-Link pinout

Posted on August 7, 2019 - August 8, 2019 by Kamil (aka. v3l0c1r4pt0r)
DS150E

This device could easily be found at the Chinese sellers. They advertise them as DS150E. Under the hood there is nice STM32 and STM8 pair. One is present on main PCB (in my case TCS MAIN V6.0), the other on relay board (TCS+RELAY V3.0). Both chips have their ST-Link headers broken out. If one want to read/write the firmware installed in internal flash, it should be as easy as connecting few of these pins. Continue reading “New VCI+A-BT (DS150E) ST-Link pinout” →

Posted in RandomTagged CAN, can-hacking, electronics, English, hacking, hardware, PCB, pinout, Reverse Engineering, STM32, STM84 Comments

mhz14a – program for managing MH-Z14/MH-Z14A CO2 sensors via UART

Posted on February 17, 2019 - May 30, 2019 by Kamil (aka. v3l0c1r4pt0r)
MH-Z14A CO2 sensor

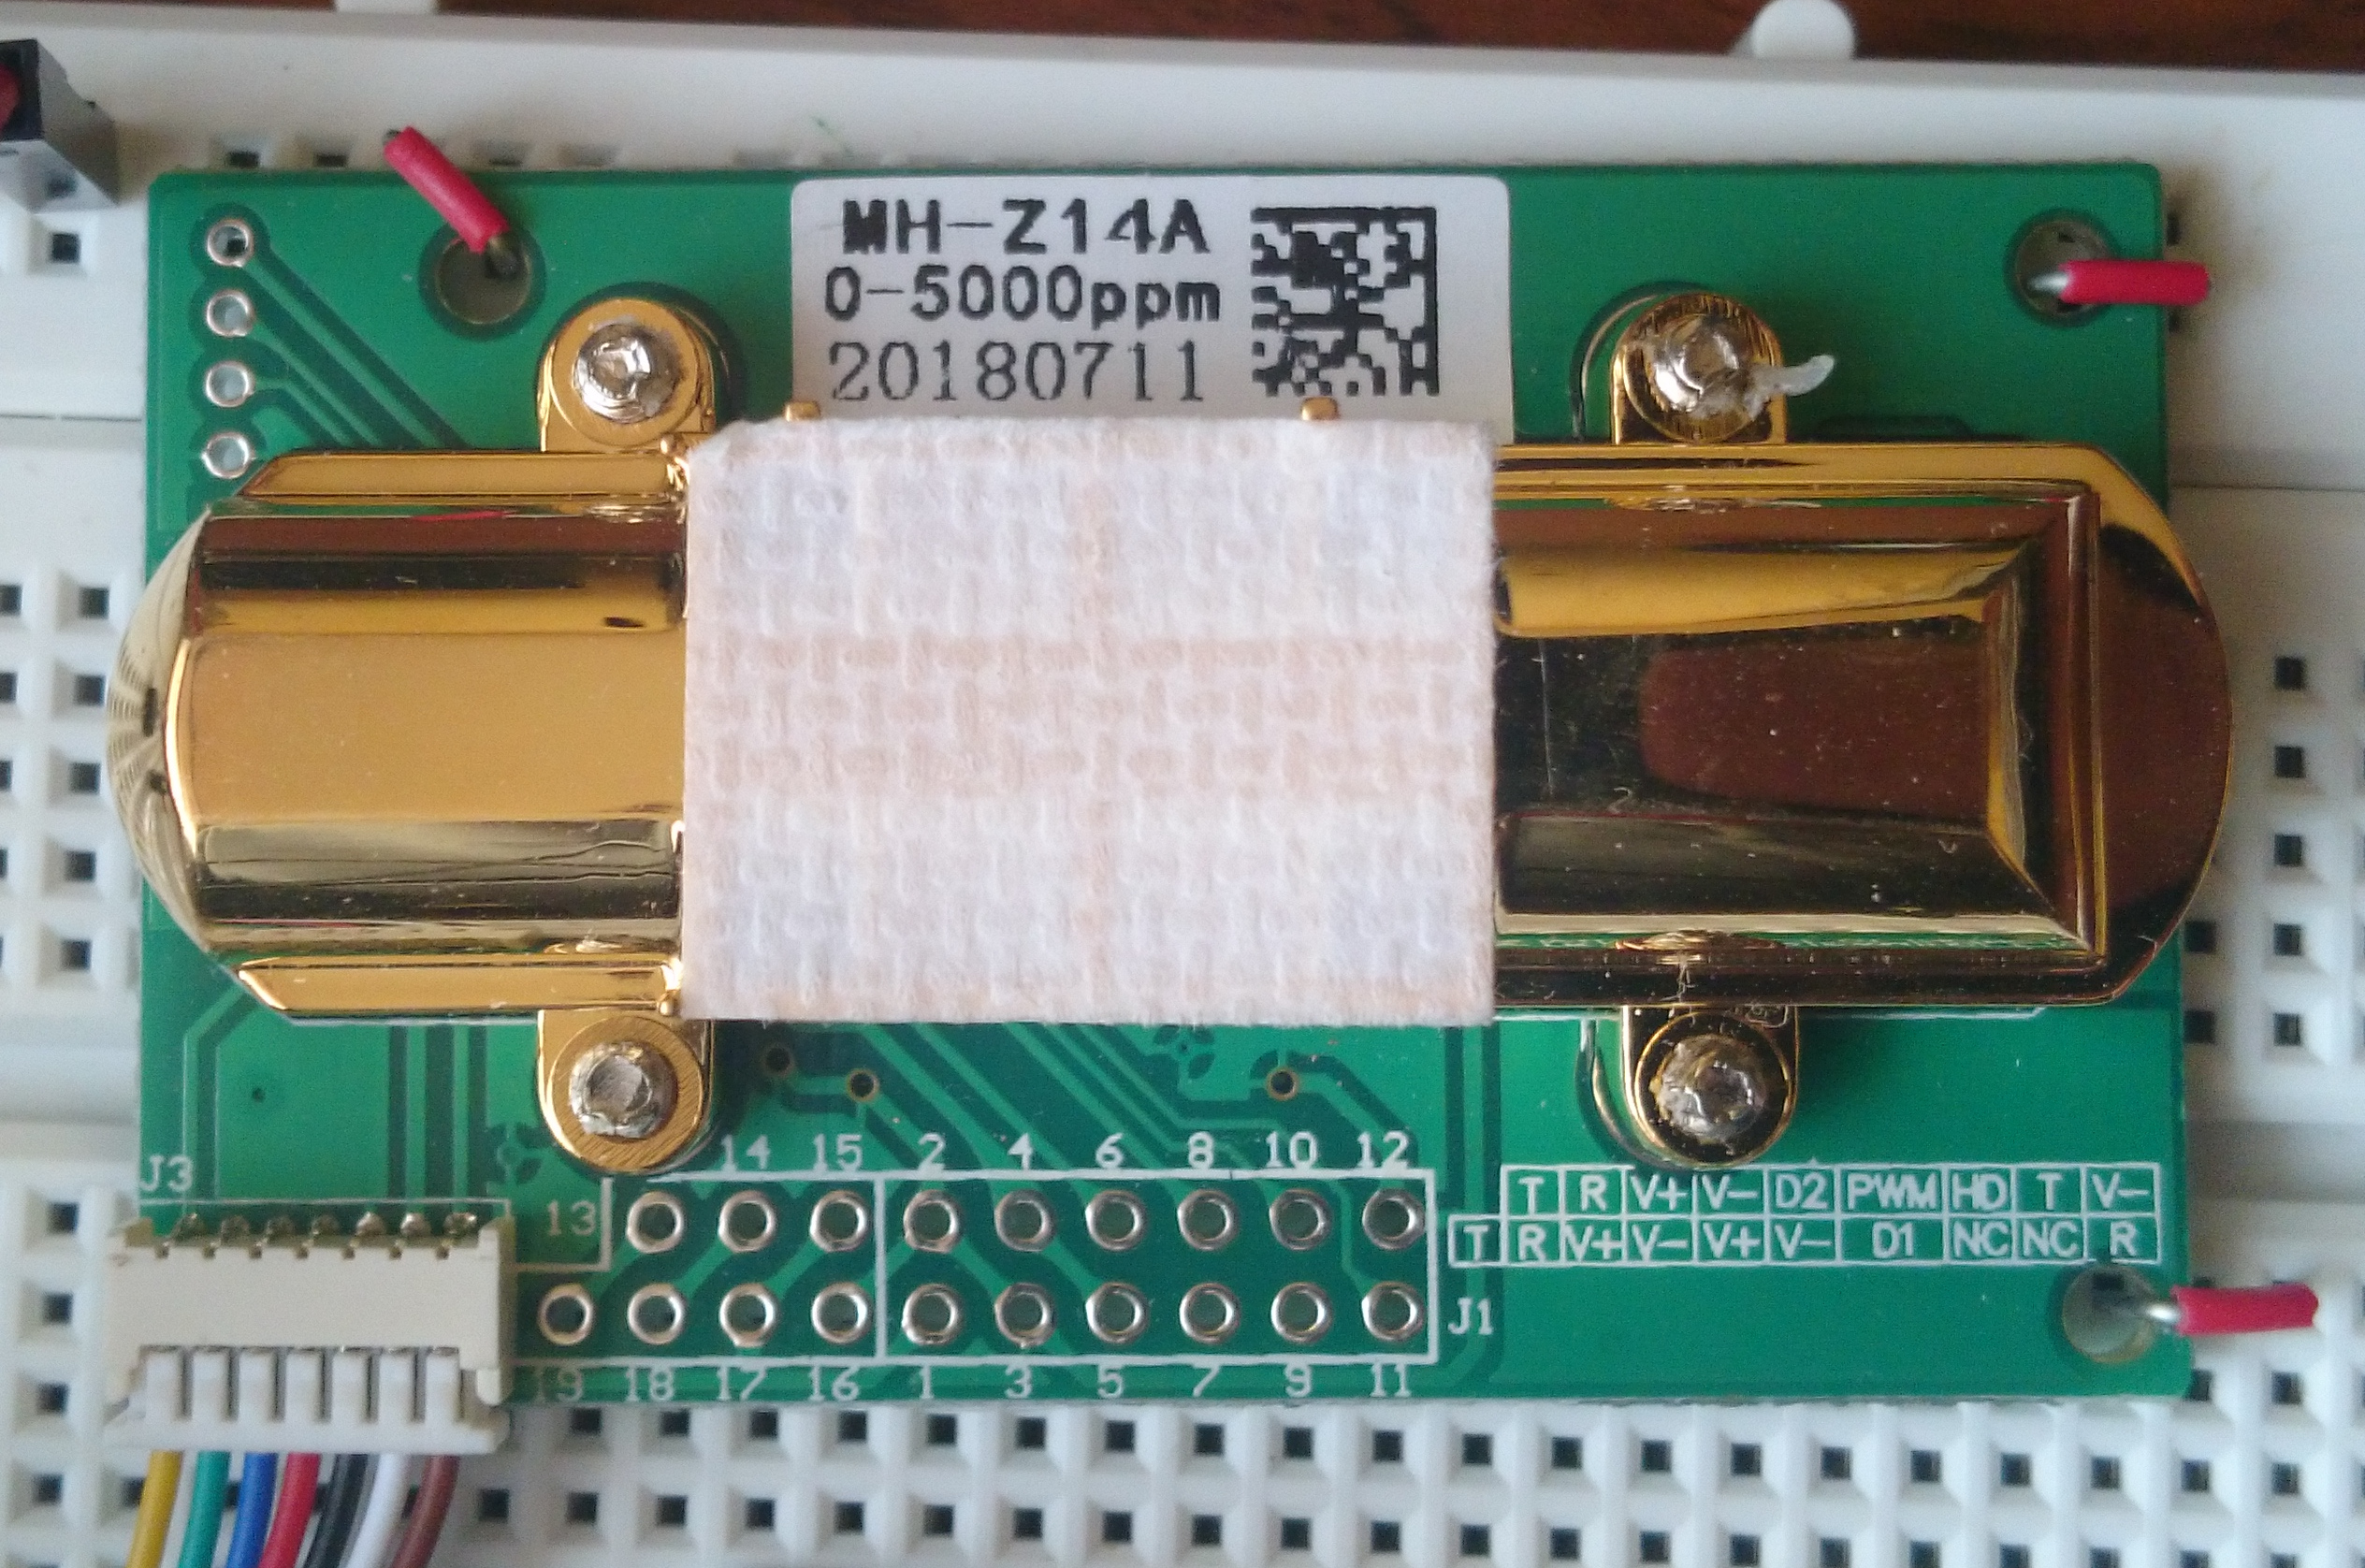
When I have seen CO2 sensor for the first time, it was quite expensive device. Well, if one want to buy consumer device these days, it still could cost a lot. However in the days of cheap Chinese electronics sellers on biggest auction platforms, for makers, situation is quite different now. MH-Z14 is the cheapest CO2 sensor I was able to find. I costs about $19 and comes in few variants: MH-Z14 and MH-Z14A. Also it can measure up to 1000 ppm, up to 2000 ppm or up to 5000 ppm. However the range does not matter in practice, as it is possible to switch between them using UART.

The device interfaces are quite flexible for such a cheap device, as beside mentioned UART port it provides PWM and analog output. However, I was not able to measure valid value using analog and my cheap multimeter. Maybe some more sophisticated equipment is required for that.

I have to make one note here: device I bought is labeled as MH-Z14A and its range is 0-5000 ppm. Other variants might have different features. For mine, there is no UART protocol documentation. Yet, protocol documented under name MH-Z14 works, so be careful. Continue reading “mhz14a – program for managing MH-Z14/MH-Z14A CO2 sensors via UART” →

Posted in UncategorizedTagged electronics, English, hardware, Linux, MH-Z14A, sensor, softwareLeave a comment

UART pinout for noname spy camera

Posted on November 3, 2018 - October 6, 2019 by Kamil (aka. v3l0c1r4pt0r)
HD camera

HB-WIFI-Z6 - front
Front side of the main board

As I wrote few months ago, I bought tiny WiFi camera, advertised as a spy camera or nannycam. This week, I decided to work on the topic a bit. However, due to some serious failure, I alarmed on Twitter, I was not able to connect to its WiFi hotspot anymore. Therefore I had to use UART to recover it from backup. Below you can find parameters needed to connect to this cam. At first however I want to present any identification numbers, that might be useful to confirm it is the same device, as it has no real name.

Identification

HD camera - overview
Device overview (rubber package already stripped from PCB)

As can be seen in picture on the right, the device consists of main PCB, camera with tape cable, battery pack and optional USB cable for charging. To be able to reach UART header, I had to strip the rubber package from main board. Below I was able to see two identification strings:

  1. HB-WIFI-Z6 – this is most likely the name of the board, unfortunately neither Google or even Taobao does not know it
  2. MS-ME198407 – this is very interesting, as it seems to mean some internal name of laptop computer (don’t know who is the vendor)

Furthermore on camera tape there is one more magic string – HY-OV9712-6. After first dash it seems to be oh – not to be confused with zero). How do I know it? Because OV9712 is model name of camera optics made by OmniVision and it more or less matches the parameters of the camera.

Last batch of IDs is, at first processor name and vendor, which is quite unusual at least outside China – T10 made by Ingenic, which appear to produce MIPS cores and dev boards for it. Also I can see in logs the board should be called ISVP, which is not necessarily true – see Google. At last cpuinfo says that system type is mango, which appear to be fairly common in cheap Chinese cameras. Continue reading “UART pinout for noname spy camera” →

Posted in RandomTagged English, hardware, pinout, UART16 Comments

USB to serial converter drivers for Android revisited

Posted on June 13, 2018 - November 14, 2020 by Kamil (aka. v3l0c1r4pt0r)
CP2102

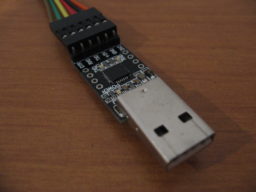
Few years ago I compiled kernel drivers of cheap USB-to-serial converter for my previous Android phone. It took few years of using new phone, without single custom-compiled kernel module. Now it is time to change it. By the way, I am going to describe what changed and what hacks have to be made to make the process work on stock ROM, provided by Sony.

kernel is the key

First of all, we need kernel. To be precise, kernel sources. Without that, it is really hard to be successful (I don’t want to tell it is impossible, but really hard, believe me). Because Sony is very liberal in terms of cooperation with community, they provide anything required to tinker with the device (obviously together with caution message about warranty loss, but who cares, right? 🙂 ).

First of all, we need to know, which firmware version the device uses. To be found in Android settings, as compilation number, or something like that. For me, it is 23.5.A.0.575. Then, we have to visit Open Devices downloads section and find our firmware. For me, it was a lot of scrolling, as I have no updates available for quite some time. Inside the package, there should be kernel directory, with complete kernel sources. Continue reading “USB to serial converter drivers for Android revisited” →

Posted in Tutorials, UncategorizedTagged Android, driver, English, hardware, kernel, Linux, tty, UART2 Comments

LKV373A: porting objdump

Posted on December 30, 2017 - October 17, 2019 by Kamil (aka. v3l0c1r4pt0r)

This article is part of series about reverse-engineering LKV373A HDMI extender. Other parts are available at:

  • Part 1: Firmware image format
  • Part 2: Identifying processor architecture
  • Part 3: Reverse engineering instruction set architecture
  • Part 4: Crafting ELF
  • Part 5: Porting objdump
  • Part 6: State of the reverse engineering
  • Part 7: radare2 plugin for easier reverse engineering of OpenRISC 1000 (or1k)

After part number four, we already have ELF file, storing all the data we found in firmware image, described in a way that should make our analysis easier. Moreover, we have ability to define new symbols inside our ELF file. The next step is to add support for our custom architecture into objdump and this is what I want to show in this tutorial.

Finding best architecture to copy

If we want to set up new architecture in objdump code, we need to learn interfaces that need to be implemented. It would be easier if we can use some existing code to do so. After some looking into the binutils’ code I learned that what is of special interest are bfd and opcodes libraries. They contain code dedicated to particular architectures. The first one seem to be related to object file handling (which in our case is ELF), so we should not tinker with it too much. Second one is related to disassembling binary programs, so is what we are looking for.

I did some quick examination of source code related to popular architectures and it seems not to be easy to adjust to our needs. Architecture I found to be best suitable for modification is Microblaze. Its source seem to be quite well-written, clean and short. Also from my research of architecture name for LKV373A (part 2, failed by the way) I also remember it is quite similar to the one present in LKV373A, so it is even better decision to use it.

Compiling objdump for target architecture

At first it is useful to learn how to compile objdump, so it will be able to disassemble program written for our target. Microblaze is not really a mainstream architecture, so there aren’t many programs compiled for it available online after typing 'microblaze program elf' into usual search engine. However, I was able to find 2 of them, so I was able to verify that compilation worked. If you can’t find any, I uploaded these to MEGA, so they can serve as test cases. First one is minimal valid file, the other one is quite huge.

Compilation is very easy. The only thing that needs to be done beside usual ./configure && make && make install is adding target option to configure script. So, the script looks as follows:

./configure --target=microblaze-elf

Of course, install step can safely be skipped as well as compilation of other tools, beside objdump. objdump itself seem to be built using make binutils/objdump. However it can’t be build successfully using that shortcut, so whole binutils package must be configured the way, everything not buildable is excluded from the build.

Setting up own architecture

Next step is to add support for our brand new, custom architecture to binutils’ configuration files and copy microblaze sources, so they will simulate our architecture, until we will write our own implementation. Then it should be possible to test objdump again, against our sample microblaze programs and disassembly should still work.

Even without any modification to binutils’ source or configs, it should be possible to configure it for any random architecture. The only constraint is format of the target string: ARCH-OS-FORMAT, where FORMAT is most likely to be elf. So, if we pass lkv373a-unknown-elf as target, it will work. -unknown part is usually skipped and this will not work. If we need it to work, config.sub must be modified. config.sub is used to convert any string, passed to configure into canonical form, so in our case lkv373a-unknown-elf. If it detects, that it is already in canonical form, it does nothing.

Final configure command will be slightly more complex, as we have to disable some parts, that are not of our interest and requires additional effort to work:

./configure --target=lkv373a-unknown-elf --disable-gas --disable-ld --disable-gdb

Although passing something random as target option works on configure stage, it will obviously fail on make stage. What make is doing at first is configuring all the sublibraries. What is of our interest is bfd and opcodes. And the first one fails. So this is the first problem, we need to get rid of.

bfd/config.bfd

The purpose of this file is to set some environment variables depending on target architecture. If it does not know the architecture, it returns error to caller, which is probably bfd’s configure script, called by make. According to documentation in file header, it sets following variables:

  1. targ_defvec – default vector. This links target to list of objects that will provide support for ELF file built for specific architecture (stored in bfd/configure.ac)
  2. targ_selvecs – list of other selected vectors. Useful e.g. when we need support for both 32- and 64-bit ELFs. Not needed here.
  3. targ64_selvecs – 64-bit related stuff. Used when target can be both 32- and 64-bit, meaningless in our case.
  4. targ_archs – name of the symbol storing bfd_arch_info_type structure. It provides description of architecture to support.
  5. targ_cflags – looks like some hack to add extra CFLAGS to compiler. We don’t care.
  6. targ_underscore – not sure what it is, should have no impact on our goals (possible values are yes or no)

To sum up, what we need to do on this step is to define default vector, we will later add to configure.ac and set name of architecture description structure. The structure itself will be defined later. Finally, I ended up with the following patch:

@@ -173,6 +173,7 @@ hppa*)     targ_archs=bfd_hppa_arch ;;
 i[3-7]86)   targ_archs=bfd_i386_arch ;;
 i370)     targ_archs=bfd_i370_arch ;;
 ia16)     targ_archs=bfd_i386_arch ;;
+lkv373a)  targ_archs=bfd_lkv373a_arch ;;
 lm32)           targ_archs=bfd_lm32_arch ;;
 m6811*|m68hc11*) targ_archs="bfd_m68hc11_arch bfd_m68hc12_arch bfd_m9s12x_arch bfd_m9s12xg_arch" ;;
 m6812*|m68hc12*) targ_archs="bfd_m68hc12_arch bfd_m68hc11_arch bfd_m9s12x_arch bfd_m9s12xg_arch" ;;
@@ -924,6 +925,10 @@ case "${targ}" in
     targ_defvec=iq2000_elf32_vec
     ;;

+  lkv373a*-*)
+    targ_defvec=lkv373a_elf32_vec
+    ;;
+
   lm32-*-elf | lm32-*-rtems*)
     targ_defvec=lm32_elf32_vec
     targ_selvecs=lm32_elf32_fdpic_vec

bfd/configure.ac

Now we need to define vector, we just declared to use for lkv373a architecture.

505     k1om_elf64_fbsd_vec)         tb="$tb elf64-x86-64.lo elfxx-x86.lo elf-ifunc.lo elf-nacl.lo elf64.lo $elf"; target_size=64 ;;
506     lkv373a_elf32_vec)           tb="$tb elf32-lkv373a.lo elf32.lo $elf" ;;
507     l1om_elf64_vec)              tb="$tb elf64-x86-64.lo elfxx-x86.lo elf-ifunc.lo elf-nacl.lo elf64.lo $elf"; target_size=64 ;;

Unfortunately, as we did modifications to .ac script, we now need to rebuild our configure. From my experience, any tinkering with autohell, after solving one problem, creates 5 more. We need to get into bfd directory and reconfigure project:

cd bfd
autoreconf

Now, if it worked for you, you should definitely go, play some lottery 🙂 . For me it said that I need exactly same version of autoconf as used by binutils’ developers. Because autoconf is so great, probably what I will show now is completely useless for anyone, but hacks I needed to do are at first to add:

20 m4_define([_GCC_AUTOCONF_VERSION], [2.69])

to the beginning of configure.ac file. Then bfd/doc/Makefile.am contains removed cygnus option at the beginning, in AUTOMAKE_OPTIONS, so we need to remove it. After that doing automake --add-missing, as autoreconf suggests, and then again autoreconf should solve the problem. But, as I said, this will probably not work for you. I can only wish you good luck.

(if were following the steps, you might have noticed that autoconf complained about not being in version 2.64 and we overridden version from 2.69 to 2.69 and it worked 🙂 , don’t ask me, why, please!)

After this step, compilation should start (and obviously will fail miserably on bfd as it misses few symbols). Now its time to make bfd compilable.

bfd/elf32-lkv373a.c

This file is meant to provide support for custom features of ELF file. As we don’t have any, we can safely do nothing here. Good template of such file is elf32-m88k.c as it does exactly this.

One thing that seem to be important here is EM value of architecture described. EM is an enum used in ELF file to define target architecture, so it might be required to adjust in our new elf32-lkv373a.c file. By the way definition of this value have to be added to include/elf/common.h:

433 /* LKV373A architecture */
434 #define EM_LKV373A              0x373a

It might also be a good idea to add it to elfcpp/elfcpp.h. To make the file compile, it is necessary to add following to bfd/bfd-in2.h as value of bfd_architecture enum:

2398   bfd_arch_lkv373a,    /* LKV373A */

bfd/archures.c

As we declared bfd_lkv373a_arch as symbol with CPU description structure, we now need to add this declaration to archures.c, as this is the file, where it will be used. We have to add:

611 extern const bfd_arch_info_type bfd_l1om_arch;
612 extern const bfd_arch_info_type bfd_lkv373a_arch;
613 extern const bfd_arch_info_type bfd_lm32_arch;

bfd/targets.c

Similar situation is in targets.c file. Here we have to provide declaration of our vector as bfd_target. This will be another structure, which seem to be generated automatically, so we should not care about it.

704 extern const bfd_target l1om_elf64_fbsd_vec;
705 extern const bfd_target lkv373a_elf32_vec;
706 extern const bfd_target lm32_elf32_vec;

bfd/cpu-lkv373a.c

This last file, we need in bfd, provides bfd_arch_info_type structure and… that’s it! Can be easily borrowed from cpu-microblaze.c with only slight modifications. One thing that needs explanation here is section_align_power. As far as I understand it, it is power of two to which the beginning of the section in memory must be aligned. It should be safe to put 0 here, as we are not going to load our ELF into memory.

This should close the bfd part of initialization. As you can see, there was no development at all to be done here. Let’s now go to opcodes library.

opcodes/configure.ac

At first we need to define objects to build for LKV373A architecture in opcodes library. This is quite similar to what we had to do in configure.ac of bfd library.

282         bfd_iq2000_arch)        ta="$ta iq2000-asm.lo iq2000-desc.lo iq2000-dis.lo iq2000-ibld.lo iq2000-opc.lo" using_cgen=yes ;;
283         bfd_lkv373a_arch)       ta="$ta lkv373a-dis.lo" ;;
284         bfd_lm32_arch)          ta="$ta lm32-asm.lo lm32-desc.lo lm32-dis.lo lm32-ibld.lo lm32-opc.lo lm32-opinst.lo" using_cgen=yes ;;

Hopefully, -dis file will be enough to be implemented. I’ve made a copy from microblaze configuration. The same way we will copy whole source file and any related headers in the next step.

Now, similarly to bfd’s configure.ac, we have to reconfigure it. And again, nobody knows what errors we will encounter.

opcodes/disassemble.c

The only thing that have to be done here is to set pointer of disassemble function. For this following snippets should be added:

53 #define ARCH_lkv373a
255 #ifdef ARCH_lkv373a
256     case bfd_arch_lkv373a:
257       disassemble = print_insn_lkv373a;
258       break;
259 #endif

And to disassemble.h:

62 extern int print_insn_lkv373a           (bfd_vma, disassemble_info *);

opcodes/lkv373a-dis.c

This is, where real stuff will happen. As our goal, for now, is not to make implementation of LKV373A architecture, but rather set everything up, so objdump will build, we can copy source file from microblaze-dis.c. It is also required to copy headers, related to MicroBlaze, used by this file, so:

  • opcodes/microblaze-dis.h
  • opcodes/microblaze-opc.h
  • opcodes/microblaze-opcm.h

And change include directives in them to link to lkv373a file, rather than microblaze ones.

Now, optionally we could change names of any symbols referring to name microblaze, but this should not be required, as original microblaze files should not be included in the build. The only change than need to be done is print_insn_microblaze into print_insn_lkv373a, as this is what we added to disassemble.c.

You should now be able to compile working objdump with LKV373A support (of course with wrong implementation, for now). We can now verify that everything works on slightly modified ELF file for MicroBlaze architecture (EM field must point to LKV373A – value must be 0x373a). Well done!

NOTE: all the steps, done till now are available on tutorial-setup tag in repository on Github.

Functions to implement

Now, finally the real fun starts. Bindings between opcodes library and objdump itself, require at least print_insn_lkv373a to be implemented.

What should happen inside this function is quite simple and can be described in following steps:

  1. Gets bfd_vma and struct disassemble_info (called info below) as parameters
  2. Read raw data containing instructions using info->read_memory_func
  3. Call info->memory_error_func in case of any errors
  4. Use info->fprintf_func to print disassembled instruction into info->stream
  5. Optionally use info->symbol_at_address_func to determine if there is any symbol declared at address decoded from instructions
  6. If symbol exists, call info->print_address_func
  7. Return number of bytes consumed

Following is some documentation, I wrote for easier implementation (mostly translated inline comments), of functions to be called:

  /**
   * \brief Function used to get bytes to disassemble
   *
   * \param memaddr Address of the current instruction
   * \param myaddr Buffer, where the bytes will be stored
   * \param length Number of bytes to read
   * \param dinfo Pointer to info structure
   *
   * \return errno value or 0 for success
   */
  int (*read_memory_func)
    (bfd_vma memaddr, bfd_byte *myaddr, unsigned int length,
     struct disassemble_info *dinfo);
  /**
   * \brief Call if unrecoverable error occurred
   *
   * \param status errno from read_memory_func
   * \param memaddr Address of current instruction
   * \param dinfo Pointer to info structure
   */
  void (*memory_error_func)
    (int status, bfd_vma memaddr, struct disassemble_info *dinfo);
  /**
   * \brief Pointer to fprintf
   *
   * \param stream Pass info->stream here
   * \param char Format string
   * \param ... vargs
   *
   * \return Number of characters printed
   */
  typedef int (*fprintf_ftype) (void *, const char*, ...) ATTRIBUTE_FPTR_PRINTF_2;
  /**
   * \brief Determines if there is a symbol at the given ADDR
   *
   * \param addr Address to check
   * \param dinfo Pointer to info structure
   *
   * \return If there is returns 1, otherwise returns 0
   * \retval 1 If there is any symbol at ADDR
   * \retval 0 If there is no symbol at ADDR
   */
  int (* symbol_at_address_func)
    (bfd_vma addr, struct disassemble_info *dinfo);
  /**
   * \brief Print symbol name at ADDR
   *
   * \param addr Address at which symbol exists
   * \param dinfo Pointer to info structure
   */
  /* Function called to print ADDR.  */
  void (*print_address_func)
    (bfd_vma addr, struct disassemble_info *dinfo);

For easier start of development, this commit can be used as template. You can find effects of implementation according to this description on lkv373a branch of my binutils fork on Github. After this step, you should have working objdump, able to disassemble architecture of your choice.

Alternative way

According to binutils’ documentation, porting to new architectures should be done using different approach. Instead of copying sources from other architectures, developers should write CPU description files (cpu/ directory) and then use CGEN to generate all necessary files. However, I found these files way too complicated comparing to goal, I wanted to achieve, therefore I used the shortcut. In reality, however, this might be a better way, as the final result should be the support for new architecture not only in objdump, but also in e.g. GAS (GNU assembler). If you want to go that way, another useful resource might be description of CPU description language.

Plans for the future

As I am now able to speed up reverse engineering of both instruction set and LKV373A firmware, I am planning to create public repository of my progress and guess operations done by some more opcodes as I already know only few of them. So, I will probably push some more commits to binutils repo as well. I hope this will enable me to gain some more knowledge about LKV373A and allow, me or someone else, to reverse engineer second part of the firmware, which seem to be way more interesting that the one, I was reverse engineering till now.

Posted in Reversing LKV373A, TutorialsTagged English, hacking, hardware, Linux, programming, Reverse Engineering, softwareLeave a comment

Posts navigation

Older posts

Tags

Android assembly busybox C CAN can-hacking cc-factory cmake compiler docker Dreamspark electronics English gcc hacking hardware JavaCard JCOP kernel KiCAD library Linux PC PCB pinout PKI polski programming Python radio Raspberry Pi Reverse Engineering RTL-SDR SDC SDM SDR smart card software tor tty UART UEFi Windows X.509 Xperia Pro

Recent Posts

  • New ccfactory on its way, binutils are already here
  • Unboxing, startup and first impression of Nezha board marketed as first affordable RISCV SBC
  • Docker image with just cURL
  • uCM4 – really small CM4 carrier board for network projects
  • My small library of KiCAD footprints

Recent Comments

  • nogats07 on Playing with GF-07 GPS device
  • nogats on Playing with GF-07 GPS device
  • Blue on uCM4 – really small CM4 carrier board for network projects
  • Fernando on New VCI+A-BT (DS150E) ST-Link pinout
  • Eliezer on New VCI+A-BT (DS150E) ST-Link pinout

Categories

  • News
  • Random
  • Reversing LKV373A
  • Setting up new v3 Hidden Service with ultimate security
  • Tutorials
  • Uncategorized
  • Understanding JCOP

Links

  • Me @ github
  • LKV373A Wiki
  • DevTomek

Archives

  • July 2021
  • June 2021
  • May 2021
  • December 2020
  • November 2020
  • October 2020
  • August 2020
  • December 2019
  • November 2019
  • October 2019
  • August 2019
  • July 2019
  • February 2019
  • November 2018
  • October 2018
  • June 2018
  • May 2018
  • March 2018
  • February 2018
  • January 2018
  • December 2017
  • November 2017
  • September 2017

Meta

  • Log in
  • Entries feed
  • Comments feed
  • WordPress.org
Proudly powered by WordPress | Theme: micro, developed by DevriX.