I am working on a project, part of which is Android application. As using Android Studio is frustrating experience and I already failed starting some projects due to its “usefulness”, this time I decided to work the problem around as much as I can, since the project is quite important to me and amount of development to be done is rather significant. Usually I would use some low level language for that as it guarantees best performance, or Python for its ease of use. But I already have experience in building complex stuff in C/C++ and tried webapps in Python/Django, so I know it would be too much for a hobby project. At the same time I remember PHP as very nice tool for a guy who have little experience. So after preparing successful PoC for PHP side, I decided to bundle whole PHP inside of Android application. This allows to deliver environment with similar concepts as notorious Electron, but way less resource hungry. Let me present you PHP for Android development. Just to be clear I show here only binary side, no Android project configuration here, but if I manage to prepare a demo app for that, I will make it as part 2 of this post. Continue reading “PHP build for use bundled in Android applications”
Category: Tutorials
Running graphical apps inside Docker containers
It happens from time to time that I want to use some application that I do not consider trustworthy. If the app is using only a console as its interface this is easy – create new disposable Docker container and that’s it. However for apps using Xorg this is not so easy. In such cases the quickest solution is to have either dedicated virtual machine, or separate PC exactly for this use case. However none of these 2 solutions is easy to use, nor is fast enough, especially for resource-hungry applications. To have smoothest experience, Docker still sounds like the best solution. Exactly for this purpose I created a template that should allow running any application closed in docker jail and even with possibility to cut it from internet access. Continue reading “Running graphical apps inside Docker containers”
Authorizing adb connections from Android command line (and making other service calls from cli)
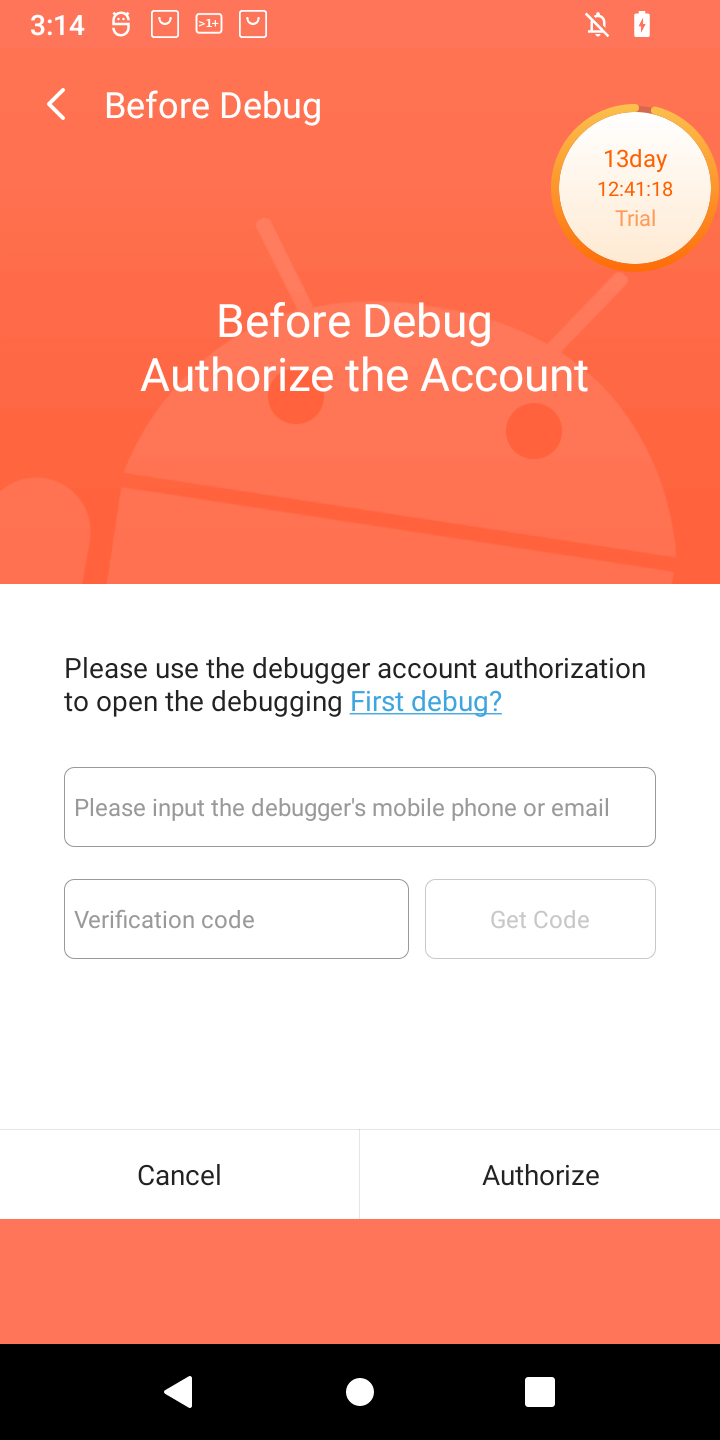
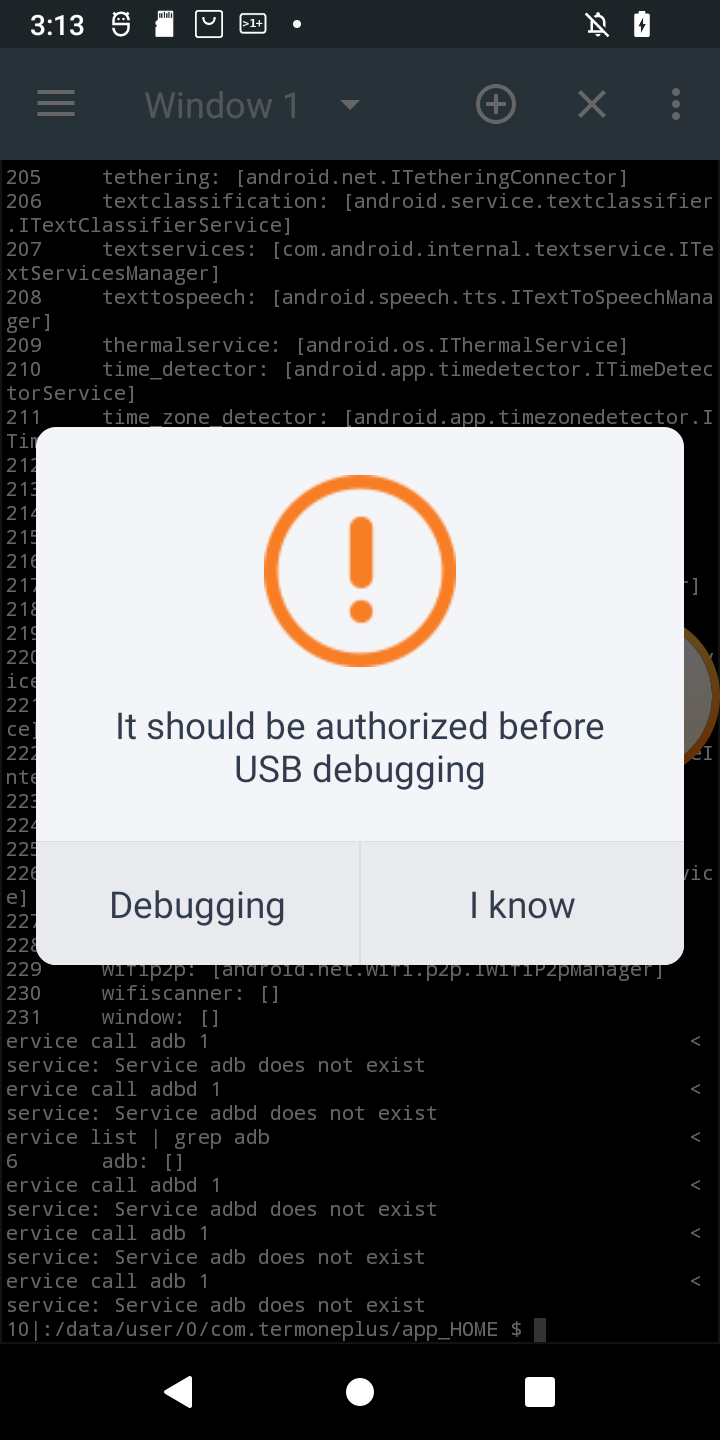
I just received POS tablet, precisely Sunmi V2s. I bought it for fraction of its prize due to alleged vendor lock. Due to that I was prepared for long fight for its freedom 😀 When starting the play it turned out that it has 14-day trial period, inside which it is possible to do almost anything in the system, just like with the ordinary Android device. Obviously one of the first things to do (especially due to this trial counting down from 14 days), was to enable adb. Developer options was enabled the usual way, but then after enabling adb and trying to connect from PC, instead of well known confirmation window with computer fingerprint, such a thing popped up on the screen:
Of course, as is usual for Chinese vendors, translation is a literal translation of Chinese glyphs into English words, so I had to click both buttons to see the difference 🙂 Anyway when Debugging is clicked, login page appears for Sunmi partner. While registration is open, the name suggest, it might not be successful for me. So I need another way. And it seems another way exists. In my case rooting the device was required at first, but for now I will ignore that part. What I want to show is how in general start digging in service calls from command line (I think I have another interesting use case on other device 🙂 ). So, without boring you all, even more, let’s get started. Continue reading “Authorizing adb connections from Android command line (and making other service calls from cli)”
How to recover torrent from rtorrent meta files
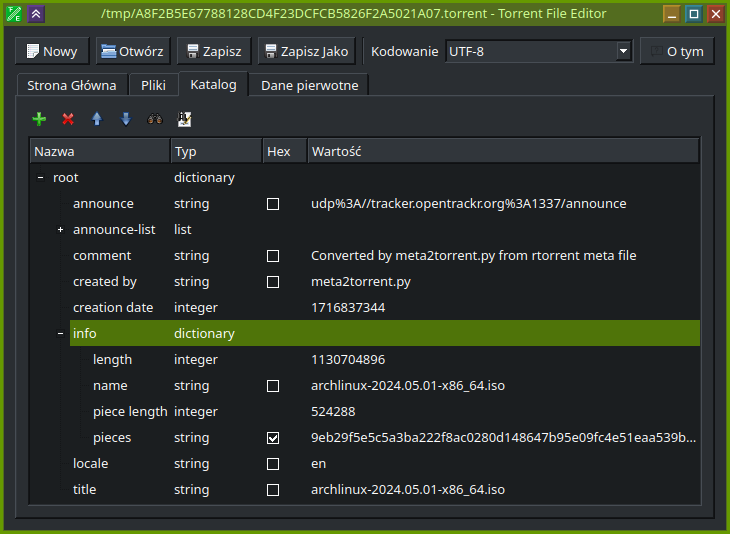
rtorrent is very nice tool to download torrents quickly and on headless systems. However, while making such a quick use, I was caught by its weird design decision that it comes unconfigured and while not configured explicitly it does not store its session in any way, even as torrent files of jobs that were started. I can imagine that in many cases it is not a problem as still usually torrent files are easily available and if not using magnet to obtain one is not a problem. Unfortunately I ran into such a weird situation where I was not able to start a job again with just a magnet link and obviously was not able to download whole torrent at one run. Also saving session in rtorrent was not working. So the only chance for me to recover download job was to use meta file that rtorrent leaves behind for reason unknown. There is even Github issue discussing those files and requesting ability to use them to recover the job. But unfortunately it is still open. So the only way for me was to do it myself. Continue reading “How to recover torrent from rtorrent meta files”
Connecting WMS services to apps able to handle only OpenStreetMap format like OsmAnd Android app
So thing is that there is a lot of interesting map data provided by state institutions (at least here in Europe), but at the same time viewer that at least Polish Geoportal provides does not provide experience good enough for everyone (that is my personal opinion) and at the same time there exist cool Android app that is able to integrate many different map providers and for some reason include neither WMS, nor WMTS support. And these two are core of services like mentioned Geoportal and seems like a standard for GIS purposes. As this seemed to me like a nice, little and easy side project, I took an opportunity. What I did is basically a wrapper that takes format used by OSM (called Slippy Map) and generates WMS-compatible request under the hood. But as you, the user, are here, you probably are not interested that much in technical details, but rather seek a solution to the problem that I had. So, here it is.
Continue reading “Connecting WMS services to apps able to handle only OpenStreetMap format like OsmAnd Android app”Sniffing USB traffic with DSLogic logic analyzer into pcap file
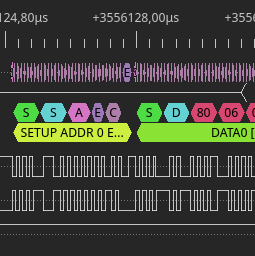
Lately I came back to reverse engineering project that I started few years ago. Direct reason for such a long break was being stuck at attempts in using usbmon to capture USB traffic. The traffic that I wanted to sniff was between router and modem that connects to it via USB. As is usual with this kind of devices there is no SDK available and compiling custom kernel module for such system, while has huge educational value, is most likely going to end up with failure. So definitely I needed another way around this problem. Fortunately I have DSLogic logic analyzer, that could easily record such a slow protocol as USB. Then a bit of exporting and you get pcap file for wireshark. This might sound like a simple task, but I am going to show that it is not necessarily is. Continue reading “Sniffing USB traffic with DSLogic logic analyzer into pcap file”
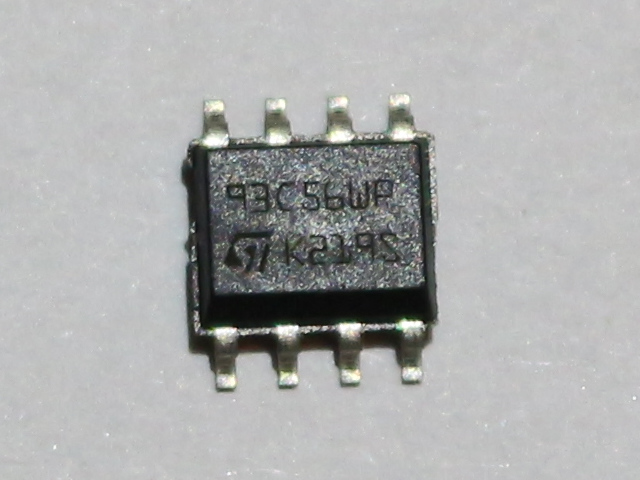
Reading and programming 93Cx6 EEPROM with Digispark
For some time already, I am working on a big reverse engineering topic. I hope, I will be able to present something on that in future. Of course this would be something almost unique, if finished. For now I want to present a tool that I made while working on this big thing (as a side note, it’s not the first one, cc-factory was also created for that purpose).
What I had to do, was to read contents of EEPROM, that I found on board, I am analyzing. It is quite obscure, as Google did not return anything useful (beside Taobao auctions). Fortunately I learned that chip it is connected to expect EEPROM from the 93Cx6 series. So, to not break anything, I bought few similar memory chips from usual source. In the meantime, I found that this thing talks Microwire protocol, which is quite similar, but not identical to SPI. This means that flashrom is not an option here. It is however similar enough to SPI that some people were successful in talking to these EEPROMs on SPI bus. Unfortunately, I did not have any device that was confirmed successful and I did not want to experiment with low chance of success. Luckily for me, there is simple Arduino library, that bit-bangs the protocol. I am not a big fan of Arduino, but I have few Digispark boards, so I decided to give it a try. Obviously, the fact that this post appeared means, I was successful. Nevertheless, it was not that easy. At least for me, so I share my experience, just in case someone have similar problem. Enough of this, let’s read (and write, if you want) Microwire 93C56 EEPROM with Arduino sketch and Digispark board, via USB virtual serial port. Because, why not? 🙂 Continue reading “Reading and programming 93Cx6 EEPROM with Digispark”
Busybox-based Linux distro from scratch

Today, I would like to show something different, than usual reverse-engineering, that appears on my blog usually. I needed to prepare a Linux distro for myself to be able to run it on my PC. But not the ordinary operating system that we download from webpage, then use fancy graphical installer to select, what we want and where. My goals were very specific. First was to have it custom-compiled. With that in mind there aren’t many choices left (maybe Gentoo?). Second was to not cross 16 MiB boundary. Why exactly that? That’s simple. I have old (15 years old to be precise) SD/MMC card made for Canon of exactly that size. Quick check showed me that this is possible. I tried buildroot and it failed to fulfill second requirement and I decided not to continue, despite the obvious optimizations on kernel modules, I could do. It’s simply too complex for such a simple task. If not buildroot, then let’s go and see how to do such thing from scratch!
The plan
Basically the plan is to have custom Linux distro compiled from scratch. It may sound like something incredibly complex and hard to do. But it’s not. There are just few problems one must learn on how to overcome. The most problematic constraint in my case is, obviously, 16 MiB limit. To not exceed it, I have to use busybox as my userspace. This by the way simplifies distro development significantly. Busybox works the way, that, if linked statically, requires only one, single binary to be able to work correctly. So, to sum up, on software side, we need Linux and busybox. You may wonder, how do I want to boot that system, then? Well. I said I need Linux 🙂 Maybe some people know, some does not, that Linux is itself a boot loader of some kind. At least, when using UEFI and this is what I want to use, it can be loaded directly by UEFI firmware. But that’s another thing to note – I will describe a way to prepare a distro for UEFI – it won’t be as simple as that, for legacy BIOS.
The whole plan will look as follows:
- Get compiler
- Compile Linux kernel
- Compile busybox (statically and stripped!)
- Prepare initramfs with whole userspace
- Format drive as EFI System Partition
- Combine kernel and initramfs into single binary
- Optionally sign the binary, in case we want Secure Boot to be enabled
- Add entry to embedded UEFI boot manager
In the meantime, I am going to show few ways to debug the system, in case of any problems. Continue reading “Busybox-based Linux distro from scratch”
Mounting encrypted Android emulator image

Android emulator is really nice way to play with Android’s internals. Unfortunately at least those emulators, which have Play Store preinstalled, also don’t have root access via adb root command. What is more, latest emulators started encrypting userdata partition, even if no lock mechanism is configured and there is no way to undo the encryption from inside the Android.
In this article, I will show how to gain access to emulator’s partitions from outside the emulator.
Note: I didn’t need to write anything, so I didn’t try to reencrypt the partition. Continue reading “Mounting encrypted Android emulator image”
Using CMocka for unit testing C code
Writing unit tests along with the source code (or even before the code itself – see TDD) is currently very popular among programmers writing in languages like Java or C#. For C code, however it is a bit different. There are only a few frameworks enabling the possibility to write unit tests. One of them is quite special – it allows to mock functions. And its name is CMocka. Unfortunately there are not many resources that describes the process of setting up cmocka, especially together with cmake to allow programmers add new executables, tests and mocks without unnecessary overhead. But before showing how to do it, let’s go back to basics (if you already know them, you can skip next heading). Continue reading “Using CMocka for unit testing C code”