For some time already, I am working on a big reverse engineering topic. I hope, I will be able to present something on that in future. Of course this would be something almost unique, if finished. For now I want to present a tool that I made while working on this big thing (as a side note, it’s not the first one, cc-factory was also created for that purpose).
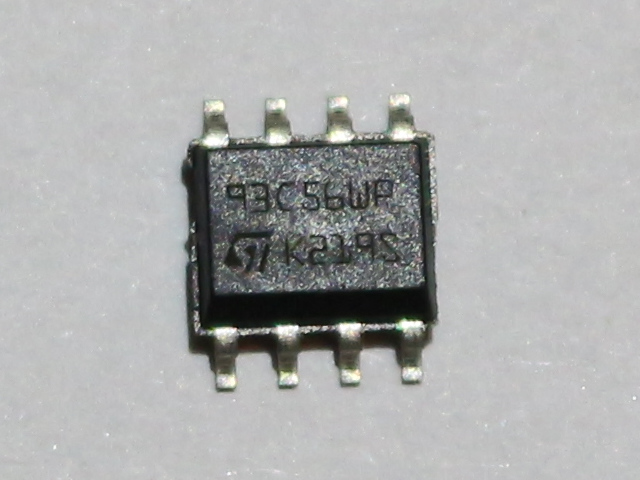
What I had to do, was to read contents of EEPROM, that I found on board, I am analyzing. It is quite obscure, as Google did not return anything useful (beside Taobao auctions). Fortunately I learned that chip it is connected to expect EEPROM from the 93Cx6 series. So, to not break anything, I bought few similar memory chips from usual source. In the meantime, I found that this thing talks Microwire protocol, which is quite similar, but not identical to SPI. This means that flashrom is not an option here. It is however similar enough to SPI that some people were successful in talking to these EEPROMs on SPI bus. Unfortunately, I did not have any device that was confirmed successful and I did not want to experiment with low chance of success. Luckily for me, there is simple Arduino library, that bit-bangs the protocol. I am not a big fan of Arduino, but I have few Digispark boards, so I decided to give it a try. Obviously, the fact that this post appeared means, I was successful. Nevertheless, it was not that easy. At least for me, so I share my experience, just in case someone have similar problem. Enough of this, let’s read (and write, if you want) Microwire 93C56 EEPROM with Arduino sketch and Digispark board, via USB virtual serial port. Because, why not? 🙂 Continue reading “Reading and programming 93Cx6 EEPROM with Digispark”
Busybox-based Linux distro from scratch
Today, I would like to show something different, than usual reverse-engineering, that appears on my blog usually. I needed to prepare a Linux distro for myself to be able to run it on my PC. But not the ordinary operating system that we download from webpage, then use fancy graphical installer to select, what we want and where. My goals were very specific. First was to have it custom-compiled. With that in mind there aren’t many choices left (maybe Gentoo?). Second was to not cross 16 MiB boundary. Why exactly that? That’s simple. I have old (15 years old to be precise) SD/MMC card made for Canon of exactly that size. Quick check showed me that this is possible. I tried buildroot and it failed to fulfill second requirement and I decided not to continue, despite the obvious optimizations on kernel modules, I could do. It’s simply too complex for such a simple task. If not buildroot, then let’s go and see how to do such thing from scratch!
The plan
Basically the plan is to have custom Linux distro compiled from scratch. It may sound like something incredibly complex and hard to do. But it’s not. There are just few problems one must learn on how to overcome. The most problematic constraint in my case is, obviously, 16 MiB limit. To not exceed it, I have to use busybox as my userspace. This by the way simplifies distro development significantly. Busybox works the way, that, if linked statically, requires only one, single binary to be able to work correctly. So, to sum up, on software side, we need Linux and busybox. You may wonder, how do I want to boot that system, then? Well. I said I need Linux 🙂 Maybe some people know, some does not, that Linux is itself a boot loader of some kind. At least, when using UEFI and this is what I want to use, it can be loaded directly by UEFI firmware. But that’s another thing to note – I will describe a way to prepare a distro for UEFI – it won’t be as simple as that, for legacy BIOS.
The whole plan will look as follows:
- Get compiler
- Compile Linux kernel
- Compile busybox (statically and stripped!)
- Prepare initramfs with whole userspace
- Format drive as EFI System Partition
- Combine kernel and initramfs into single binary
- Optionally sign the binary, in case we want Secure Boot to be enabled
- Add entry to embedded UEFI boot manager
In the meantime, I am going to show few ways to debug the system, in case of any problems. Continue reading “Busybox-based Linux distro from scratch”
Meet CC Factory – a factory for cross compilers
Having a tailored cross compiler is a problem I encountered couple of times in the past. Of course there are solutions to that problem like great crosstool-ng or more complex buildroot. In most cases crosstool-ng (ct-ng) can solve them. But whatever the tool we use, it has always its own drawbacks. For ct-ng these are small number of supported versions of toolchain components and huge dependence of environment, where it is started. The latter is even more problematic, because of the way continuing interrupted build work in ct-ng. Obviously if you want to build in example one compiler for ARM and one for MIPS, both consisting of latest tools, then it is not a problem.
But I have another use case for compiling toolchains. I do some reverse engineering from time to time. Nowadays many products have Linux under the hood and often there is no chance to get any SDK for them. But having ability to build something for the device can help a lot, either to run it there, or link with found tools and run in emulator. But I could also imagine that outside the reverse engineering field there might be a need to get toolchain in exact configuration, which is sadly not available via ct-ng or buildroot. Anyway, in any case where ct-ng or buildroot are not applicable, there is third way – docker. And this is the way I chose. This is how CC Factory appeared. It is docker container that builds gcc cross compiler on first startup and lands you in an container that have working compiler for the platform of your choice. And it does not require big effort to port it for the next architecture, or different tool version, unless the changes between the versions were really significant. Continue reading “Meet CC Factory – a factory for cross compilers”
Peugeot 407 rain sensor pinout
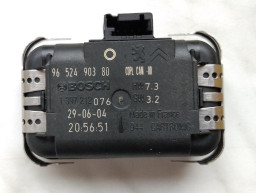
I had a project in mind featuring rain sensor, present in Peugeot 407 car, among others, probably. However, reality is that it is on my todo list for years now and I don’t think I will do it ever. But, I already bought the sensor in the past and it was lying in my drawer. So why not to disassemble it and figure out the pinout.
Identification
To be precise in what I am talking about, here are some magic values, I know about this thing:
- Manufacturer: Bosch
- Part number: 1 397 212
- Another number: 96 524 903 80
- Peugeot part number: 6405 CW
OpenRISC 1000 support integrated into radare2
Few months ago, as part of an effort to reverse engineer Lenkeng LKV373A HDMI to Ethernet converter, I announced disassembly plugin for radare2. This week it has been officially released by radare2 team.
My patches are integrated into radare2 version 4.1.0 and 4.1.1. They also should be currently present in GUI variant of radare2 – Cutter. Its version 1.10 is based on radare2 code version 4.1.1.
At the moment of writing this, Arch Linux still do not have these versions in repository, but I expect updates will appear in few days.
Playing with GF-07 GPS device
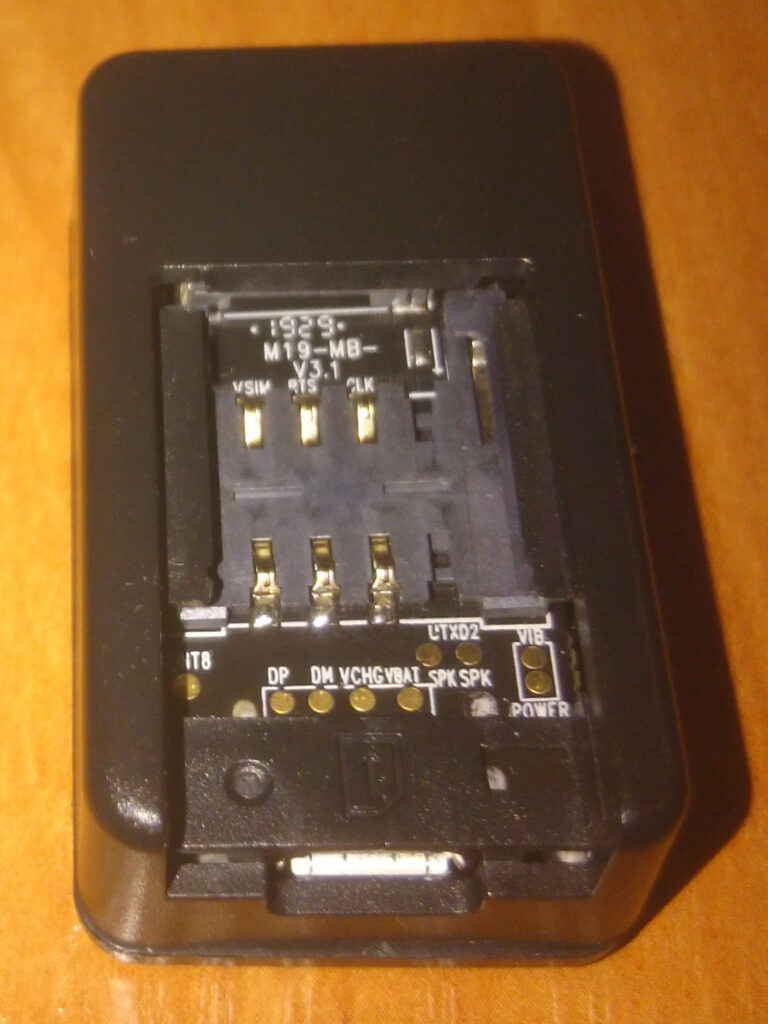
GF-07 is dirt-cheap GPS locator. You put SIM card in it, send SMS and you know where it is. That’s it. But not for me. I like to know what I am using, especially if it is that cheap and such obscure device as this one. It comes together with manual that is written in so bad English that I barely understand anything. Immediately after opening SIM slot, one can see few test pads. Fortunately all of them are described in silkscreen. Let’s see what can be done with it as a one-evening hack.
Hacking Android’s Bluetooth application to receive any file (outside whitelist)
Bluetooth application in AOSP hardcodes strange constraint in form of whitelist of MIME types that are allowed to be received. Also LineageOS seems to have that code compiled for some reason. There is no other way to allow any file transfer than to make your own Bluetooth apk and install it. In this tutorial I will show how to recompile APK and install it in system.
Before I start I have to warn anybody trying to follow the tutorial: THERE IS NO WARRANTY THAT THIS METHOD WILL WORK, I am not responsible for bootloops, broken Bluetooth or any other harm made to your device. You, and only you are responsible for your device, so don’t do it, if you don’t know what you’re doing! Continue reading “Hacking Android’s Bluetooth application to receive any file (outside whitelist)”
How Android smartphone is spying on you?
The fact that Android knows a lot about its user and don’t keep that information for itself is quite well known. But how much data is sent to the outside world on first connection to WiFi? Which apps are responsible for pushing the data into the web? I will try to show that on example of Xiaomi Redmi Go.
For the purpose of the test, I created network that is not forwarding any packet outside. Before performing the test I installed few APKs. Only one is known to contact strange servers – File Manager (com.rhmsoft.fm). I marked them with (*) on a list. Rest should not have any influence on the results. They were: Termux, AFWall+, F-Droid, Magisk and Aurora Store. Continue reading “How Android smartphone is spying on you?”
LKV373A: radare2 plugin for easier reverse engineering of OpenRISC 1000 (or1k)
This article is part of series about reverse-engineering LKV373A HDMI extender. Other parts are available at:
- Part 1: Firmware image format
- Part 2: Identifying processor architecture
- Part 3: Reverse engineering instruction set architecture
- Part 4: Crafting ELF
- Part 5: Porting objdump
- Part 6: State of the reverse engineering
- Part 7: radare2 plugin for easier reverse engineering of OpenRISC 1000 (or1k)
For quite a long time I did not do anything about LKV373A. During that time the guy nicknamed jhol did fantastic job on my wiki, reversing almost complete instruction set for the encoder’s processor. Beside that nothing new was appearing. This has changed few days ago, when jhol published videos about the device. After that, someone found SDK that seems to match more or less the one used to produce LKV373A firmware. At the time of writing it was not available anymore. Although it provided a lot of useful information and what is important here, it gave a possibility to identify processor architecture. It turned out to be OpenRISC 1000 (or1k). Because it is known, I compiled binutils for that architecture. Unfortunately objdump, which is part of binutils is not the best tool for reverse engineering. Lack of hacks I made for my variant of binutils, which allowed me to follow data references, was making things even worse.
The conclusion was that I need some real reverse engineering tool for or1k architecture. Unfortunately, neither IDA Pro, nor Ghidra, nor radare2 does not have support for it, which is not so surprising, if I heard about it for the first time, when somebody identified LKV373A to have such core. Only few days later, I encountered good tutorial, explaining how to add support for new architecture. I didn’t need anything else.
I am not going to explain how to write disassembly plugin (called asm
) for radare2. There are enough resources available. If one wants to try, my repository is quite nice place to start (notice template
branch there).
Out of source build and installation
In radare2, it is possible to build plugins out of source. To do that in case of or1k plugins, repository has to be cloned first with usual git clone:
git clone https://github.com/v3l0c1r4pt0r/radare2-or1k.git
Then, inside of radare2-or1k, simply type make
.
You should get two .so
files in directory asm
and anal
. You can load them with r2 switch -l
or from inside interface using:
L ./asm/asm_or1k.so L ./anal/anal_or1k.so
Be sure to load both plugins, as lack of anal plugin leads to noisy warning shown with every analyzed opcode.
Final result should look more or less like below. This is the beginning of jedi.rom
file:
0x00000000 00000000 l.j 0x0 0x00000004 15000002 invalid 0x00000008 9c200011 l.addi r1, r0, 0x11 0x0000000c b4610000 l.mfspr r3, r1, 0x0 0x00000010 9c80ffef l.addi r4, r0, 0xffef 0x00000014 e0432003 invalid 0x00000018 c0011000 l.mtspr r1, r2, 0x0 0x0000001c 18206030 invalid 0x00000020 a8210088 l.ori r1, r1, 0x88 0x00000024 9c400001 l.addi r2, r0, 0x1 0x00000028 d4011000 l.sw r1, r2, 0x0 0x0000002c 15000168 invalid 0x00000030 15000168 invalid 0x00000034 15000168 invalid 0x00000038 15000168 invalid 0x0000003c 00000031 l.j 0x100 0x00000040 15000000 invalid
That’s it. Good luck with reverse engineering!
New VCI+A-BT (DS150E) ST-Link pinout
This device could easily be found at the Chinese sellers. They advertise them as DS150E. Under the hood there is nice STM32 and STM8 pair. One is present on main PCB (in my case TCS MAIN V6.0), the other on relay board (TCS+RELAY V3.0). Both chips have their ST-Link headers broken out. If one want to read/write the firmware installed in internal flash, it should be as easy as connecting few of these pins. Continue reading “New VCI+A-BT (DS150E) ST-Link pinout”