I am working on a project, part of which is Android application. As using Android Studio is frustrating experience and I already failed starting some projects due to its “usefulness”, this time I decided to work the problem around as much as I can, since the project is quite important to me and amount of development to be done is rather significant. Usually I would use some low level language for that as it guarantees best performance, or Python for its ease of use. But I already have experience in building complex stuff in C/C++ and tried webapps in Python/Django, so I know it would be too much for a hobby project. At the same time I remember PHP as very nice tool for a guy who have little experience. So after preparing successful PoC for PHP side, I decided to bundle whole PHP inside of Android application. This allows to deliver environment with similar concepts as notorious Electron, but way less resource hungry. Let me present you PHP for Android development. Just to be clear I show here only binary side, no Android project configuration here, but if I manage to prepare a demo app for that, I will make it as part 2 of this post. Continue reading “PHP build for use bundled in Android applications”
Tag: software
New ccfactory on its way, binutils are already here

From the beginning of current year I am learning Docker. First result of this interest on my Github was publishing ccfactory tool, which was supposed to provide easy way to produce compiler toolchains. Almost like they were mass-produced in a factory, thus the name. However, since then I learned a lot and gained some experience. At the moment it is obvious to me, what I did then is not the best design. And because the project is still very fresh, I decided to start once again, from scratch, to create way better design that will be easy to develop and maintain.
Today is time to publish first step to this new design – binutils. I would not do that, but Docker Hub allows to have only one private repo, so the way that I do it disallows me to have it private anyway. So better idea is to describe it somehow to avoid confusion. As I wrote, this first step is binutils and this is simple container that contains binutils and nothing else. My goal is to finally make toolchain base on gcc version 3.3, which might sound weird, but this is what I needed in the past and is best way to prove what this new approach can achieve. With previous one, that I will call legacy from now on, I failed in that and before failing I did even more complicated Dockerfile, than originally planned. So, when finished this one will be proof of good design, I hope. Continue reading “New ccfactory on its way, binutils are already here”
Docker image with just cURL
Lately I play a bit with Docker containers. In a chain of problems that I have right now, I needed to have static cURL library on Debian. As it turned out linking cURL statically is not an easy task. Rather it causes a lot of problems, especially when trying this with packages available in Debian repos. After a long fight with these I decided to prepare my own distribution of cURL. But instead of creating usual deb package, I did it all on Docker and as a result, I have Docker image. In it I utilized possibilities of staged builds, where there can be few steps having in common only certain files. As a result I created base image, means the one created from scratch, where there are no other files, than the ones that we provide. So I provided only complete cURL install directory and musl libc to be able to run curl binary, as I did not want to tinker with cURL’s build system even more, than I did. Final image weights only ~1,5 MiB, so a result is really nice space saving compared to usual approach to Docker images. Inside, you can run curl binary separated from your operating system (to extent that Docker provides – remember, it is not virtualization!). Also it is possible to use libcurl to link your own binaries with it, this time completely statically!
As always, sources are on Github and this time there are also ready-to-use images on Docker Hub, so you can pull them directly, without need to build them. All instructions are on both pages and this is nothing unusual for any user of Docker, so I will not repeat myself here.
LKV373A: radare2 plugin for easier reverse engineering of OpenRISC 1000 (or1k)

This article is part of series about reverse-engineering LKV373A HDMI extender. Other parts are available at:
- Part 1: Firmware image format
- Part 2: Identifying processor architecture
- Part 3: Reverse engineering instruction set architecture
- Part 4: Crafting ELF
- Part 5: Porting objdump
- Part 6: State of the reverse engineering
- Part 7: radare2 plugin for easier reverse engineering of OpenRISC 1000 (or1k)
For quite a long time I did not do anything about LKV373A. During that time the guy nicknamed jhol did fantastic job on my wiki, reversing almost complete instruction set for the encoder’s processor. Beside that nothing new was appearing. This has changed few days ago, when jhol published videos about the device. After that, someone found SDK that seems to match more or less the one used to produce LKV373A firmware. At the time of writing it was not available anymore. Although it provided a lot of useful information and what is important here, it gave a possibility to identify processor architecture. It turned out to be OpenRISC 1000 (or1k). Because it is known, I compiled binutils for that architecture. Unfortunately objdump, which is part of binutils is not the best tool for reverse engineering. Lack of hacks I made for my variant of binutils, which allowed me to follow data references, was making things even worse.
The conclusion was that I need some real reverse engineering tool for or1k architecture. Unfortunately, neither IDA Pro, nor Ghidra, nor radare2 does not have support for it, which is not so surprising, if I heard about it for the first time, when somebody identified LKV373A to have such core. Only few days later, I encountered good tutorial, explaining how to add support for new architecture. I didn’t need anything else.
I am not going to explain how to write disassembly plugin (called asm) for radare2. There are enough resources available. If one wants to try, my repository is quite nice place to start (notice template branch there).
Out of source build and installation
In radare2, it is possible to build plugins out of source. To do that in case of or1k plugins, repository has to be cloned first with usual git clone:
git clone https://github.com/v3l0c1r4pt0r/radare2-or1k.git
Then, inside of radare2-or1k, simply type make.
You should get two .so files in directory asm and anal. You can load them with r2 switch -l or from inside interface using:
L ./asm/asm_or1k.so
L ./anal/anal_or1k.so
Be sure to load both plugins, as lack of anal plugin leads to noisy warning shown with every analyzed opcode.
Final result should look more or less like below. This is the beginning of jedi.rom file:
            0x00000000      00000000       l.j 0x0
            0x00000004      15000002       invalid
            0x00000008      9c200011       l.addi r1, r0, 0x11
            0x0000000c      b4610000       l.mfspr r3, r1, 0x0
            0x00000010      9c80ffef       l.addi r4, r0, 0xffef
            0x00000014      e0432003       invalid
            0x00000018      c0011000       l.mtspr r1, r2, 0x0
            0x0000001c      18206030       invalid
            0x00000020      a8210088       l.ori r1, r1, 0x88
            0x00000024      9c400001       l.addi r2, r0, 0x1
            0x00000028      d4011000       l.sw r1, r2, 0x0
            0x0000002c      15000168       invalid
            0x00000030      15000168       invalid
            0x00000034      15000168       invalid
            0x00000038      15000168       invalid
            0x0000003c      00000031       l.j 0x100
            0x00000040      15000000       invalid
That’s it. Good luck with reverse engineering!
Mounting encrypted Android emulator image

Android emulator is really nice way to play with Android’s internals. Unfortunately at least those emulators, which have Play Store preinstalled, also don’t have root access via adb root command. What is more, latest emulators started encrypting userdata partition, even if no lock mechanism is configured and there is no way to undo the encryption from inside the Android.
In this article, I will show how to gain access to emulator’s partitions from outside the emulator.
Note: I didn’t need to write anything, so I didn’t try to reencrypt the partition. Continue reading “Mounting encrypted Android emulator image”
Printing pictures like its 1873 using Oki 3321 dot-matrix printer

Long, long time ago, before prices of inkjet and laser printers fell to levels allowing home users to own and use them, there was a primitive printing technology called dot-matrix. As any technology of the past, it is not competitive anymore. However it still has few advantages and one of them is reliability of these devices. Some time ago I found quite a cheap Oki 3321 printer that has 9 pin head and is capable of printing on A3 paper in portrait orientation. Usual mode of printing for these devices was simple text mode, where you just were writing your text in ASCII (or any weird coding popular in your country of origin) to its parallel port. Fortunately these printers usually had also graphic mode, where you could fully use capabilities of the device.
I already was experimenting some time with my device, so I already know it uses Mazovia variant (with zł as single glyph) as its codepage. I was also able to guess how to switch into graphic mode, so in theory I was able to print images for some time. Unfortunately any CUPS drivers I used did not provide acceptable results, so all I could do was to write some support tool myself. Continue reading “Printing pictures like its 1873 using Oki 3321 dot-matrix printer”
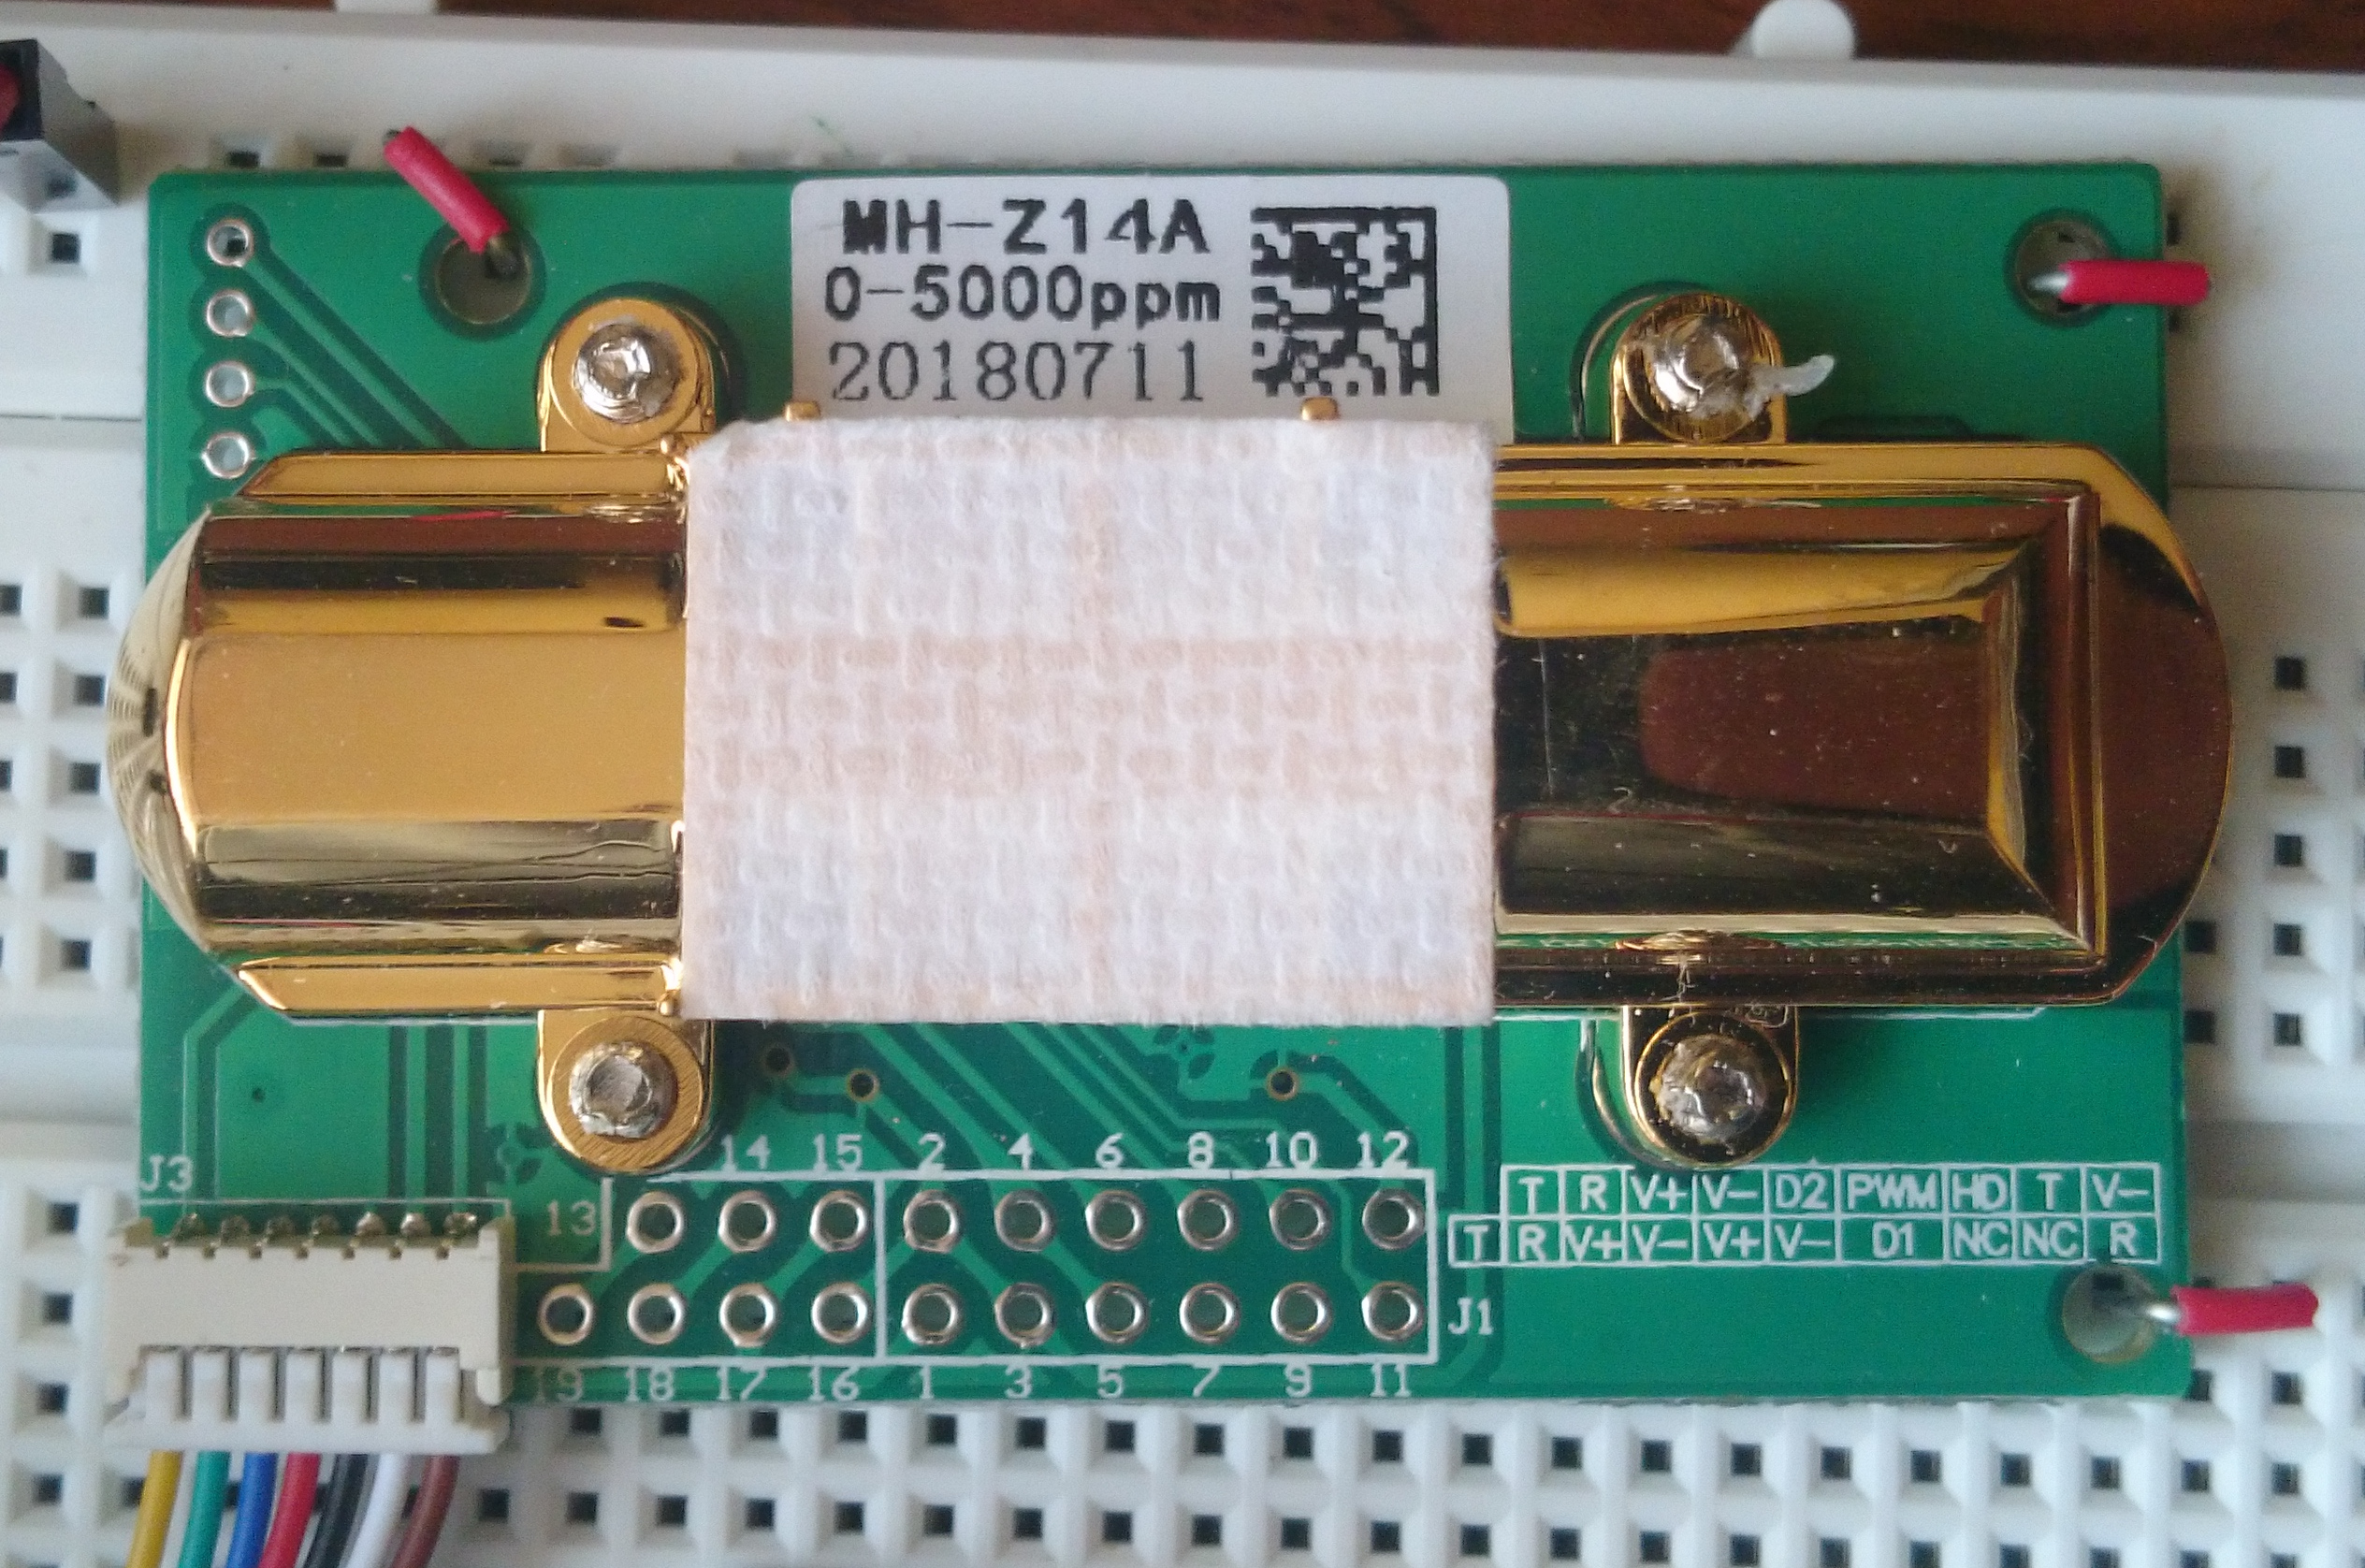
mhz14a – program for managing MH-Z14/MH-Z14A CO2 sensors via UART

When I have seen CO2 sensor for the first time, it was quite expensive device. Well, if one want to buy consumer device these days, it still could cost a lot. However in the days of cheap Chinese electronics sellers on biggest auction platforms, for makers, situation is quite different now. MH-Z14 is the cheapest CO2 sensor I was able to find. I costs about $19 and comes in few variants: MH-Z14 and MH-Z14A. Also it can measure up to 1000 ppm, up to 2000 ppm or up to 5000 ppm. However the range does not matter in practice, as it is possible to switch between them using UART.
The device interfaces are quite flexible for such a cheap device, as beside mentioned UART port it provides PWM and analog output. However, I was not able to measure valid value using analog and my cheap multimeter. Maybe some more sophisticated equipment is required for that.
I have to make one note here: device I bought is labeled as MH-Z14A and its range is 0-5000 ppm. Other variants might have different features. For mine, there is no UART protocol documentation. Yet, protocol documented under name MH-Z14 works, so be careful. Continue reading “mhz14a – program for managing MH-Z14/MH-Z14A CO2 sensors via UART”
SADVE – tiny program for computing #define values
While tinkering with spy camera, I found one detail that is significantly slowing the process of reverse engineering and debugging the applications, installed on its embedded Linux platform – finding final values of preprocessor directives and sometimes also results of sizeof() operator.
As I am not aware of any existing solution for that problem (I guess there might be some included in one of the more sophisticated IDEs, however I use Vim for development) it is good reason to create one. By the way I used cmake template I published some days ago to bootstrap the project. Continue reading “SADVE – tiny program for computing #define values”
Using CMocka for unit testing C code

Writing unit tests along with the source code (or even before the code itself – see TDD) is currently very popular among programmers writing in languages like Java or C#. For C code, however it is a bit different. There are only a few frameworks enabling the possibility to write unit tests. One of them is quite special – it allows to mock functions. And its name is CMocka. Unfortunately there are not many resources that describes the process of setting up cmocka, especially together with cmake to allow programmers add new executables, tests and mocks without unnecessary overhead. But before showing how to do it, let’s go back to basics (if you already know them, you can skip next heading). Continue reading “Using CMocka for unit testing C code”
Setting up new v3 Hidden Service with ultimate security: Part 4: Installing client certificates to Firefox for Android

This post is a part of Tor v3 tutorial. Other parts are:
- Hidden Service setup
- PKI and TLS
- Client Authentication
- Installing client certificates to Firefox for Android
As we now have Hidden Service, requiring clients to authenticate themselves with proper certificate, it would be great to be able to use Android device to access the service. As I shown before, on desktop Firefox it was quite trivial. Unfortunately, things are different on Android. Mobile Firefox does not have any interface for adding any certificates. Furthermore, unlike Chrome, it does not use default Android certificate vault, providing it own instead. On the other hand, under the hood it is more or less the same Firefox, so the support itself is present. Therefore, we need to hack into Firefox internal databases and add the certificate there. In this part, I will show, how to do that.
Caution: similarly to desktop browser, you should not add any random certificates to your main browser. It is even worse idea to do the same with Orfox, as it might allow attackers to reveal your identity. Newer Androids have ability to create user accounts, furthermore Firefox has profiles features, just like on desktop, but harder to use. If you want to do, what is described here, separating this configuration from any other is first thing to do.
Installing CA certificate
Before we do that with user certificate, let’s start with CA. It is way easier, as Firefox has convenient feature allowing to install certificates by browsing them. All we need to provide is a valid MIME type – application/x-x509-ca-cert. So, all we need is some webserver, which we will configure to treat files with extension .crt to be treated as mentioned type. Just after opening certificate file, Firefox should ask if you are sure about adding the certificate and allow you to choose for what purpose it will be used. It also allows to view the certificate to make sure, it is the one we intended to add.
In theory there is very similar MIME for user certs – application/x-x509-user-cert, but for some reason, what Firefox says after opening this type of file is:
“Couldn’t install because the certificate file couldn’t be read”
And the same effect is, no matter if the file is password protected or not.
Installing client certificate
- Go to
/data/data/org.mozilla.firefox/files/mozillaon Android device (root required) - Locate default Firefox profile. If there is only one directory in format
[bloat].profile, this is it. If not, fileprofiles.inishould contain only one profile withDefault=1. This is what we are looking for - Download files
cert9.dbandkey4.dbto Linux machine - Use
pk12utilto insert certificate into database:
$ pk12util -i [filename].p12 -d.
Enter password for PKCS12 file:
pk12util: no nickname for cert in PKCS12 file.
pk12util: using nickname: [email] - r4pt0r Test Systems
pk12util: PKCS12 IMPORT SUCCESSFUL
- Upload files back to Android. Make sure Firefox is not running
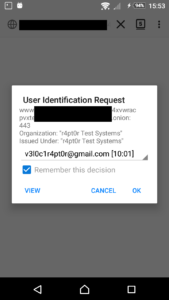
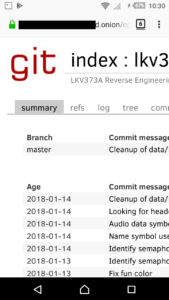
- Test it by opening your hidden service with Firefox. You should see messages similar to these:


