I am working on a project, part of which is Android application. As using Android Studio is frustrating experience and I already failed starting some projects due to its “usefulness”, this time I decided to work the problem around as much as I can, since the project is quite important to me and amount of development to be done is rather significant. Usually I would use some low level language for that as it guarantees best performance, or Python for its ease of use. But I already have experience in building complex stuff in C/C++ and tried webapps in Python/Django, so I know it would be too much for a hobby project. At the same time I remember PHP as very nice tool for a guy who have little experience. So after preparing successful PoC for PHP side, I decided to bundle whole PHP inside of Android application. This allows to deliver environment with similar concepts as notorious Electron, but way less resource hungry. Let me present you PHP for Android development. Just to be clear I show here only binary side, no Android project configuration here, but if I manage to prepare a demo app for that, I will make it as part 2 of this post. Continue reading “PHP build for use bundled in Android applications”
Tag: Android
Authorizing adb connections from Android command line (and making other service calls from cli)
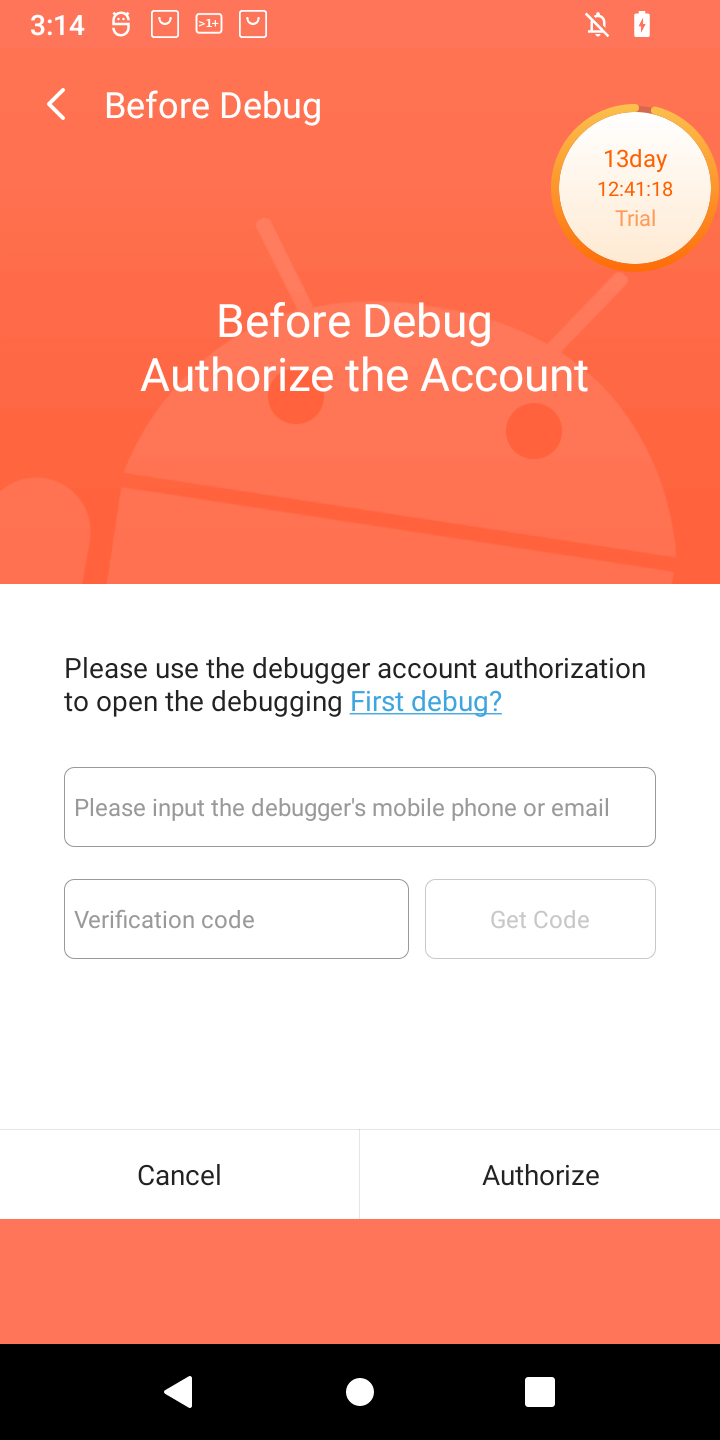
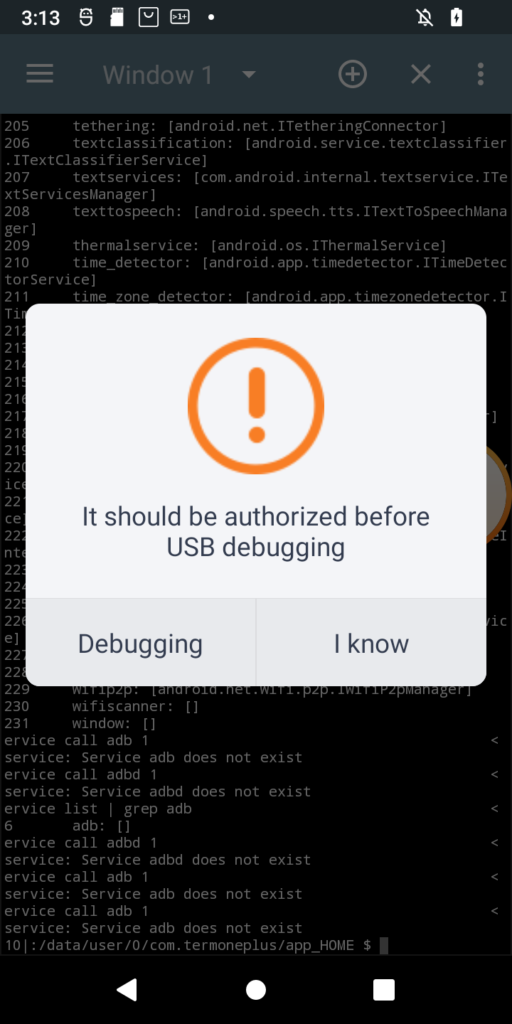
I just received POS tablet, precisely Sunmi V2s. I bought it for fraction of its prize due to alleged vendor lock. Due to that I was prepared for long fight for its freedom 😀 When starting the play it turned out that it has 14-day trial period, inside which it is possible to do almost anything in the system, just like with the ordinary Android device. Obviously one of the first things to do (especially due to this trial counting down from 14 days), was to enable adb. Developer options was enabled the usual way, but then after enabling adb and trying to connect from PC, instead of well known confirmation window with computer fingerprint, such a thing popped up on the screen:
Of course, as is usual for Chinese vendors, translation is a literal translation of Chinese glyphs into English words, so I had to click both buttons to see the difference 🙂 Anyway when Debugging is clicked, login page appears for Sunmi partner. While registration is open, the name suggest, it might not be successful for me. So I need another way. And it seems another way exists. In my case rooting the device was required at first, but for now I will ignore that part. What I want to show is how in general start digging in service calls from command line (I think I have another interesting use case on other device 🙂 ). So, without boring you all, even more, let’s get started. Continue reading “Authorizing adb connections from Android command line (and making other service calls from cli)”
Hacking Android’s Bluetooth application to receive any file (outside whitelist)

Bluetooth application in AOSP hardcodes strange constraint in form of whitelist of MIME types that are allowed to be received. Also LineageOS seems to have that code compiled for some reason. There is no other way to allow any file transfer than to make your own Bluetooth apk and install it. In this tutorial I will show how to recompile APK and install it in system.
Before I start I have to warn anybody trying to follow the tutorial: THERE IS NO WARRANTY THAT THIS METHOD WILL WORK, I am not responsible for bootloops, broken Bluetooth or any other harm made to your device. You, and only you are responsible for your device, so don’t do it, if you don’t know what you’re doing! Continue reading “Hacking Android’s Bluetooth application to receive any file (outside whitelist)”
How Android smartphone is spying on you?
The fact that Android knows a lot about its user and don’t keep that information for itself is quite well known. But how much data is sent to the outside world on first connection to WiFi? Which apps are responsible for pushing the data into the web? I will try to show that on example of Xiaomi Redmi Go.
For the purpose of the test, I created network that is not forwarding any packet outside. Before performing the test I installed few APKs. Only one is known to contact strange servers – File Manager (com.rhmsoft.fm). I marked them with (*) on a list. Rest should not have any influence on the results. They were: Termux, AFWall+, F-Droid, Magisk and Aurora Store. Continue reading “How Android smartphone is spying on you?”
Mounting encrypted Android emulator image

Android emulator is really nice way to play with Android’s internals. Unfortunately at least those emulators, which have Play Store preinstalled, also don’t have root access via adb root command. What is more, latest emulators started encrypting userdata partition, even if no lock mechanism is configured and there is no way to undo the encryption from inside the Android.
In this article, I will show how to gain access to emulator’s partitions from outside the emulator.
Note: I didn’t need to write anything, so I didn’t try to reencrypt the partition. Continue reading “Mounting encrypted Android emulator image”
USB to serial converter drivers for Android revisited
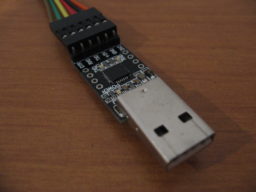
Few years ago I compiled kernel drivers of cheap USB-to-serial converter for my previous Android phone. It took few years of using new phone, without single custom-compiled kernel module. Now it is time to change it. By the way, I am going to describe what changed and what hacks have to be made to make the process work on stock ROM, provided by Sony.
kernel is the key
First of all, we need kernel. To be precise, kernel sources. Without that, it is really hard to be successful (I don’t want to tell it is impossible, but really hard, believe me). Because Sony is very liberal in terms of cooperation with community, they provide anything required to tinker with the device (obviously together with caution message about warranty loss, but who cares, right? 🙂 ).
First of all, we need to know, which firmware version the device uses. To be found in Android settings, as compilation number, or something like that. For me, it is 23.5.A.0.575. Then, we have to visit Open Devices downloads section and find our firmware. For me, it was a lot of scrolling, as I have no updates available for quite some time. Inside the package, there should be kernel directory, with complete kernel sources. Continue reading “USB to serial converter drivers for Android revisited”
Security analysis of spy camera sold by Chinese suppliers: iMiniCam app

Lately, I bought some random, noname spy camera from usual Chinese sources. Just after unboxing, one detail seemed a bit suspicious to me: together with the camera there comes a link to Android app, that is meant to control the camera. What is worse, the link leads to some Chinese app shop, obviously with only one language available (notice the version – 1.0.33, as it is not the only one in the wild):
http://m.app.so.com/detail/index?pname=com.hbwy.fan.iminicams&id=3646142
As I’ve already seen apps that i.e. calls home, despite having no need to open a single socket and then sending data like IMEI, IMSI, MAC addresses and so on, red lamp turned on and I said to myself: stop. Let’s reverse engineer the thing first!
OSINT
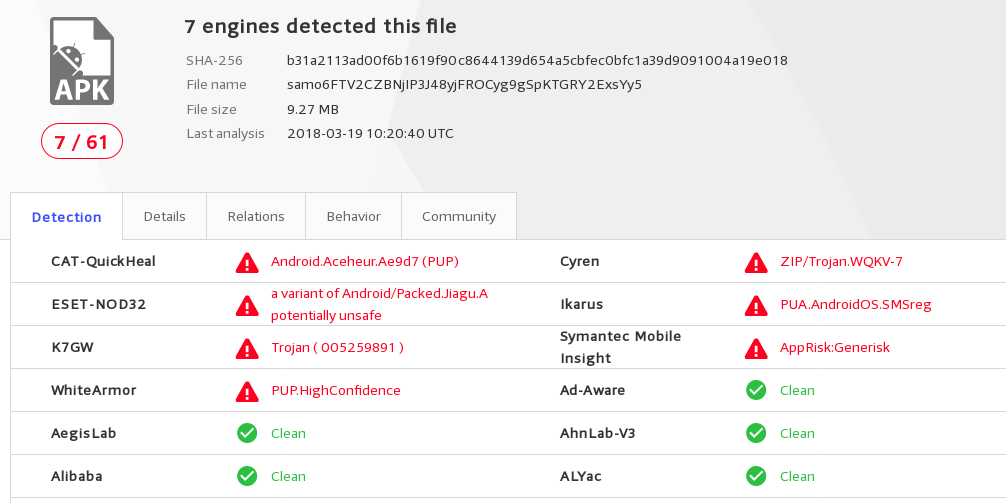
Before I begun my reverse engineering, I attempted to ask uncle Google (and his friends 🙂 ) to gain some knowledge. Usual virustotal gives me this:
Continue reading “Security analysis of spy camera sold by Chinese suppliers: iMiniCam app”
How to convert Android resource ID back into its name
Few weeks ago I made an attempt to reverse engineer some obscure Android APK. It was available only through some Chinese shop, obviously described in only one language there. Unfortunately, it turned out that every tool designed for reverse engineering APK files outputted source with mysterious resource IDs, as plain integers, which is not the most convenient way to read them. Therefore I started looking for any way to find some meaningful name from these ids. At the end of my development effort I found out, there is one file that usually might be used for that purpose – res/values/public.xml, as produced by apktool (if I remember correctly). However, according to its name it contains only public resources, so some of them are missing there (in my case at least some drawable type resources were missing). Therefore, I am publishing my program to do things even more reliably.
arscutils
This program requires my library created together, but which is separate project – libarsc. It is available, as usually through Github and also as a package to be downloaded from PyPI. Just type:
pip install libarsc
with proper privileges. Continue reading “How to convert Android resource ID back into its name”
Setting up new v3 Hidden Service with ultimate security: Part 4: Installing client certificates to Firefox for Android

This post is a part of Tor v3 tutorial. Other parts are:
- Hidden Service setup
- PKI and TLS
- Client Authentication
- Installing client certificates to Firefox for Android
As we now have Hidden Service, requiring clients to authenticate themselves with proper certificate, it would be great to be able to use Android device to access the service. As I shown before, on desktop Firefox it was quite trivial. Unfortunately, things are different on Android. Mobile Firefox does not have any interface for adding any certificates. Furthermore, unlike Chrome, it does not use default Android certificate vault, providing it own instead. On the other hand, under the hood it is more or less the same Firefox, so the support itself is present. Therefore, we need to hack into Firefox internal databases and add the certificate there. In this part, I will show, how to do that.
Caution: similarly to desktop browser, you should not add any random certificates to your main browser. It is even worse idea to do the same with Orfox, as it might allow attackers to reveal your identity. Newer Androids have ability to create user accounts, furthermore Firefox has profiles features, just like on desktop, but harder to use. If you want to do, what is described here, separating this configuration from any other is first thing to do.
Installing CA certificate
Before we do that with user certificate, let’s start with CA. It is way easier, as Firefox has convenient feature allowing to install certificates by browsing them. All we need to provide is a valid MIME type – application/x-x509-ca-cert. So, all we need is some webserver, which we will configure to treat files with extension .crt to be treated as mentioned type. Just after opening certificate file, Firefox should ask if you are sure about adding the certificate and allow you to choose for what purpose it will be used. It also allows to view the certificate to make sure, it is the one we intended to add.
In theory there is very similar MIME for user certs – application/x-x509-user-cert, but for some reason, what Firefox says after opening this type of file is:
“Couldn’t install because the certificate file couldn’t be read”
And the same effect is, no matter if the file is password protected or not.
Installing client certificate
- Go to
/data/data/org.mozilla.firefox/files/mozillaon Android device (root required) - Locate default Firefox profile. If there is only one directory in format
[bloat].profile, this is it. If not, fileprofiles.inishould contain only one profile withDefault=1. This is what we are looking for - Download files
cert9.dbandkey4.dbto Linux machine - Use
pk12utilto insert certificate into database:
$ pk12util -i [filename].p12 -d.
Enter password for PKCS12 file:
pk12util: no nickname for cert in PKCS12 file.
pk12util: using nickname: [email] - r4pt0r Test Systems
pk12util: PKCS12 IMPORT SUCCESSFUL
- Upload files back to Android. Make sure Firefox is not running
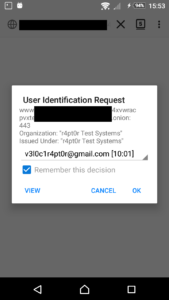
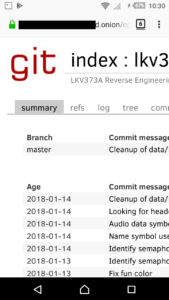
- Test it by opening your hidden service with Firefox. You should see messages similar to these:
[Import]Hacking Vasco translator through binary SMS
NOTE: This post was imported from my previous blog – v3l0c1r4pt0r.tk. It was originally published on 18th February 2017.
Recently I was asked to configure internet browser on a thing called Vasco Translator Premium 7″. The device looks exactly like many of the low-end Android tablets from China. And it happens to be one. The problem is that is was locked to used the only allowed application which is the translator. It has some minor functions like camera and it seems that was a mistake of its authors. They used default Android app as Camera and Gallery applications (and forgot to lock send message button in the latter 🙂 ).
At first I have to highlight the fact, this is not the full unlock or root of the device, but the fact of ease of the process allows me to suppose that rooting the thing should not be too difficult, too. Our goal here is to open up the web browser. Because as it seems the software below the shitty overlay is ordinary Android with all the apps on its place. And how useful might be the tablet without internet browser?
Prerequisites
The tool we will use to do the trick is good ol’ WAP Push protocol. For some reason in newer Android devices this dinosaur has been revived and supported out of the box. The goal is to send such message to our locked device, and since the gallery app mentioned above allows to escape to Messaging app, read it on it. This is probably the hardest part of the process. And possibly may require to buy some additional hardware (if you have access to any service, you know is sending WAP Push, you can use it and skip this part).
And that hardware is a GSM modem. It is highly possible that you already have one that can be used. The thing we will need is the possibility to send SMS through AT commands. Many Android phones allows that, at least if they are rooted, probably LTE/3G modems can do that too (not checked that personally). Ok, since the procedure to get access to AT interface is completely different for any device you can get, I have to leave you alone with getting used to that. After some time, you will probably end up in minicom or some similar program and parameters like 115200/8N1 or 9600/8N1. In my case (Android with Qualcomm processor) it is /dev/smd11 and params are 115200/8N1. Now you could type AT to check if the device you found is really an AT modem (should respond with OK) and AT+SCA? to check your SMS center address. You should be able to recognize it or Google it to check if it really belongs to your mobile operator.
Crafting SMS
Now, since we have all the tools, we can start crafting SMS. I will omit many details here since just general description of PDU format would take whole article and complete one is more than 100 pages long. The only part you need to know about is destination address. This will be the phone number of your device. Trailer of the message is WAP Push payload, which to be described will need another 100 or so pages, so skip it. As a remark, there is some program called wbxml2xml/xml2wbxml that allows to read/write the message. In our case, we want to enforce the device to visit Google.com, so this will be the address of WAP bookmark.
Ok, so on the picture above, thing we are interested in are [dest_addr] and [dest_len]. The first encodes telephone number “+37201234567” (note lack of ‘+’ sign), the second its length (as number of digits, 0x0b == 11). The number of your device should be placed here and you could move on to next section.
Or you can try customizing the payload. The important thing here is marked as [WBXML] and can be crafted with program mentioned before. After changing this, adjustment of [ud_len] value to number of bytes in payload (those after the length) is required.
Sending SMS
Since we already have modem, we need to type AT command to initiate message sending. But before that, we need to ensure that we are in binary mode. Type AT+CMGF? and, if value is other than zero, AT+CMGF=0. Now start sending with:
AT+CMGS=55
Where 55 is length of payload in bytes, but without SMSC header (one byte at the beginning). Modem should respond with > prompt, where SMS could be typed.
0041000b917302214365f700042a0605040b8423f0ea0601ae03056a0045c60c03676f6f676c652e636f6d00080103476f6f676c65000101
And after that press CTRL-Z (^Z) in your terminal. This should send SUB (substitute) to modem. It is important not to use any characters in between, like spaces and ENTER. After about a second, you should see that sending was successful and no error was returned.
Receiving and opening
Now, if you have your translator turned on, you should hear that new message was received, but nothing appeared on screen. That is ok. The rest of the procedure is shown on video below:
Postscriptum
After another few minutes of playing with the device I found another method of opening the browser and it is way faster than what was described below. But the first one was much more entertaining for me and is showing one of the many places where serious bugs could be found – forgotten technologies, still being implemented, possibly used, but with lack of knowledge about details in general public.
You can see the other method on video below, and possibly it is the one you want to use.


