So thing is that there is a lot of interesting map data provided by state institutions (at least here in Europe), but at the same time viewer that at least Polish Geoportal provides does not provide experience good enough for everyone (that is my personal opinion) and at the same time there exist cool Android app that is able to integrate many different map providers and for some reason include neither WMS, nor WMTS support. And these two are core of services like mentioned Geoportal and seems like a standard for GIS purposes. As this seemed to me like a nice, little and easy side project, I took an opportunity. What I did is basically a wrapper that takes format used by OSM (called Slippy Map) and generates WMS-compatible request under the hood. But as you, the user, are here, you probably are not interested that much in technical details, but rather seek a solution to the problem that I had. So, here it is.
How to set this up
There are two possible approaches. First is to host the wrapper that I wrote as a daemon on your Android device. Second is to host it somewhere else (like your private server). I use Termux to have it directly on my phone. I would expect there are other ways to access Python from inside Android device, so if for some reason you are not willing to use Termux, then you are on your own in learning your Python environment. In Termux it should be as easy as typing this into terminal:
apt install python python-pip
And you end up with working Python with its usual package manager – pip. There is one more package that we need and conveniently it is also provided by Termux and it called proj. This one is backend for all computations that my adapter does. It can be installed with:
apt install proj
Once we have all the dependencies, we can clone the repo with:
git clone git@github.com:v3l0c1r4pt0r/adaptwms.git
Enter to its root dir with cd adaptwms and install all its dependencies:
pip install -r requirements.txt
And finally you are ready to start temporary django server with:
./manage.py runserver
By default it starts on port 8000, so you should now be able navigate your phone’s browser to localhost:8000 and see generator page.
For Polish Geoportal I needed one more step – reconfigure OpenSSL to handle insecure connections. For some reason it fails with SSL error otherwise. If you encounter similar problems, all you have to do is to create openssl.cnf file with this as a contents:
openssl_conf = openssl_init

[openssl_init]
ssl_conf = ssl_sect

[ssl_sect]
system_default = system_default_sect

[system_default_sect]
Options = UnsafeLegacyRenegotiation
And then instead of the above command for starting server, issue:
OPENSSL_CONF=openssl.cnf ./manage.py runserver
Generating URLs
Easiest method to configure things properly is to use generator supplied with adaptwms. After completing previous chapter, you should have already seen it.
First step that will make setup a lot easier to debug is to get parameters of at least one tile where you expect your target WMS service to have coverage. Just navigate your browser to OpenStreetMap, open developer tools of your browser (Ctrl-Shoft-E in Firefox), find the place on a map and check details of one of the requests:
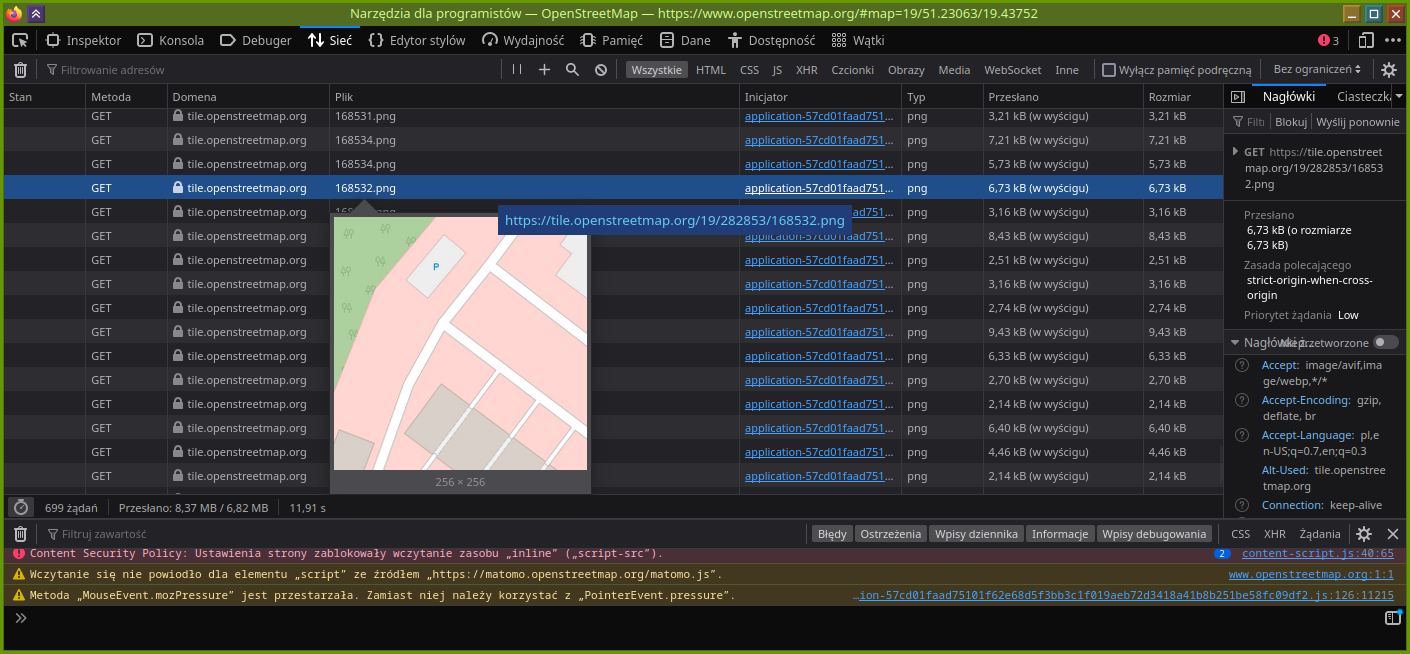
This URL is in format https://tile.openstreetmap.org/<z>/<x>/<y>.png, so now we know our values of x,y,z and can type them into adaptwms generator. The only parameter missing is URL and we can use the same method to find some tile request. Let’s say I want to adapt WMS service at URL:
https://integracja01.gugik.gov.pl/cgi-bin/KrajowaIntegracjaEwidencjiGruntow?REQUEST=GetMap&TRANSPARENT=TRUE&FORMAT=image%2Fpng&VERSION=1.3.0&LAYERS=dzialki&STYLES=&EXCEPTIONS=xml&BBOX=683295.0215900433%2C186007.86762340198%2C683779.2100584202%2C187023.86965540604&CRS=EPSG%3A2180&WIDTH=1920&HEIGHT=915&SERVICE=WMS
There are few important values that needs to be adjusted here. Most obvious is BBOX argument. This is the one that will be generated by adapter and in order to allow it to do so, it needs to be replaced with {bbox}. Next is CRS, which in this case is set to EPSG:2180, which is not supported by adaptwms and needs to be switched to EPSG:3857. And last two values are WIDTH and HEIGHT. Slippy Map format allows tiles to be only 256×256 pixels and we must set it here. So the final URL will look like this:
https://integracja01.gugik.gov.pl/cgi-bin/KrajowaIntegracjaEwidencjiGruntow?REQUEST=GetMap&TRANSPARENT=TRUE&FORMAT=image%2Fpng&VERSION=1.3.0&LAYERS=dzialki&STYLES=&EXCEPTIONS=xml&BBOX={bbox}&CRS=EPSG%3A3857&WIDTH=256&HEIGHT=256&SERVICE=WMS
One last step is to choose adapter mode of operation. Test mode is just for testing and will simply show you generated URL. You can use it at first to validate your input. For OsmAnd we will need to use fetch mode. It fetches image from URL and serve as a proxy. There is also redirect mode, but OsmAnd version that I have does not support redirections and will not show anything, when it gets 302 error redirect. For other programs it is better idea to access tile servers directly.
So now you can click submit button and in fetch, or test mode will see proper URL in your browser. Then you can use it in OsmAnd.
Usage with OsmAnd
Once you have your URL generated, open OsmAnd and from the three-dot menu tap following options:
Configure map -> Map source... -> Add
You should have landed on ‘Add online source’ window, where you can paste URL, having x. y and z values that you used for testing replaced with {0}, {1} and {2} respectively:
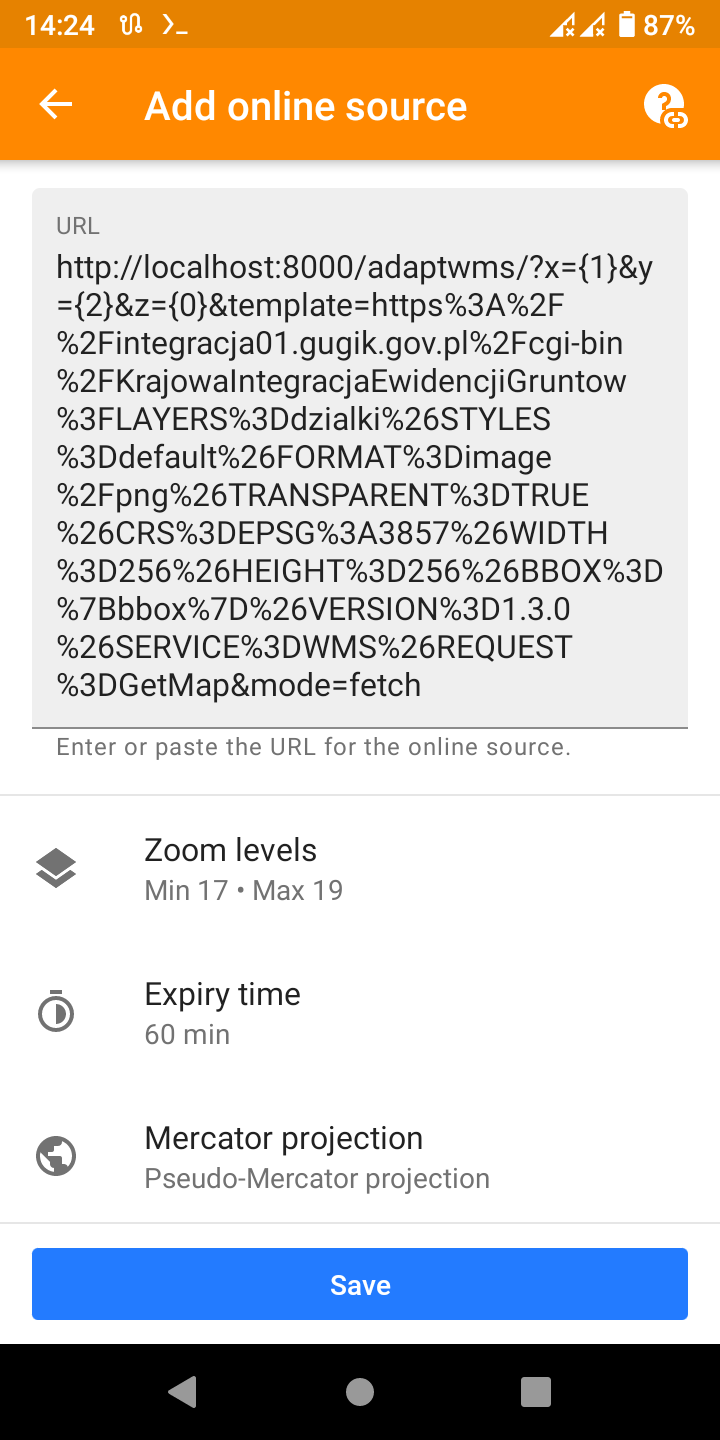
Worth noting is that for many services only small set of zoom levels will be supported and its better to start with range like above (17-19) and then maybe add one level at a time instead of trying full range and generate whole bunch of invalid requests that will be rejected by WMS service. Also ensure that you did not switch mercator to the other option. Now you can click save, switch map source to your new service and check if it works.
In case of problems, you can try reading Django logs. By default it prints every request with error code server returned to console, so you can try checking it, or even navigating your browser to it to see what happens.
And that’s all I wanted to show. Happy GIS hacking!